VCSA 6.5 Backup and Restore
Hi all,
Today we will discuss about how to take backup from VCSA 6.5 and how to restore to a new VCSA 6.5.
Now VCSA 6.5 is coming with inbuilt backup option. We can take backup directly from VCSA appliance manager portal, backup will include your PSC as well.
If you want to take daily backup or weekly backups, we can automate this backup jobs with help of scripts.
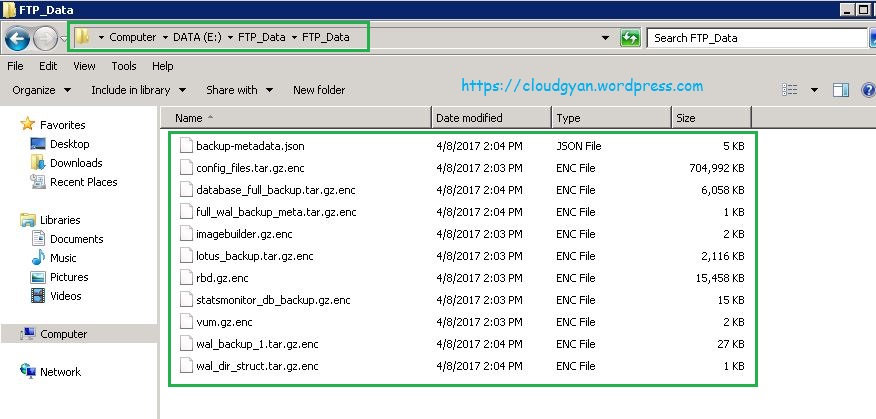
I am using FTP server as my backup repository.
We will discuss how to take a successful backup and restore to a new VMware vCenter Server Appliance 6.5.0.
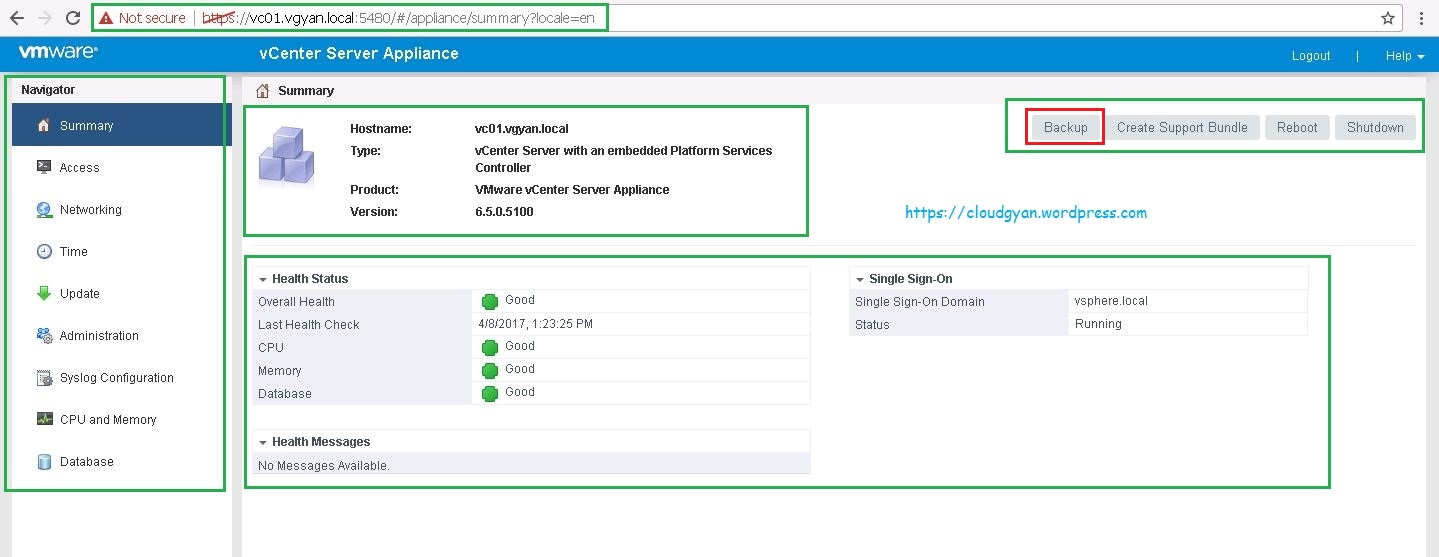
I am in my VCSA appliance manager portal with vc01.vgyan.local, it’s running on VCSA 6.5 with an embedded PSC.
Click on “Backup” button.
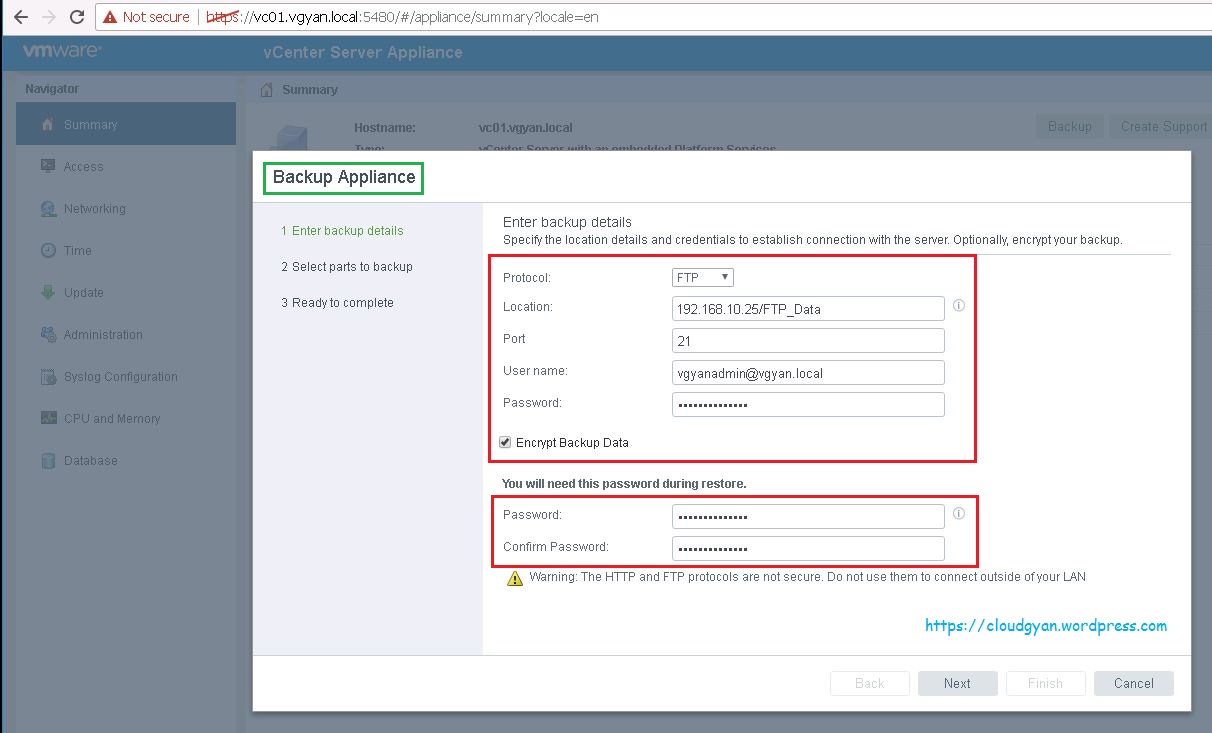
Enter your backup details:-
Select Protocol : I am using FTP ( FTP,FTPS,HTTP,HTTPS,SCP protocols are available)
Select Location: Here FTP server and share location.
Port: 21
Enter your user name and password for FTP share.
If you want to encrypt your vCenter backup, select Encrypt Backup Data option.
Next will be the most important thing, we have to provide password for our vCenter backup, you should keep this password safe. While restoring backup to new vCenter server we require this password, if you forget their is no way to restore or reset the password.
And you can see below warning: The HTTP and FTP protocols are not secure. Do not use them to connect out side of your LAN.
This is completely lab environment so I will go with FTP, If you are configuring in production consider this warning and make your design perfect.
Fill all the details and click “Next” to continue
Select which parts you want to backup,
There are two options:-
1. Common (Inventory and configuration)
2. Stats, Events, Alarms and Tasks (Historical data (statistics,events and tasks) in vCenter Server database.
Provide proper discretion for your backup.
Click “Next” to continue.

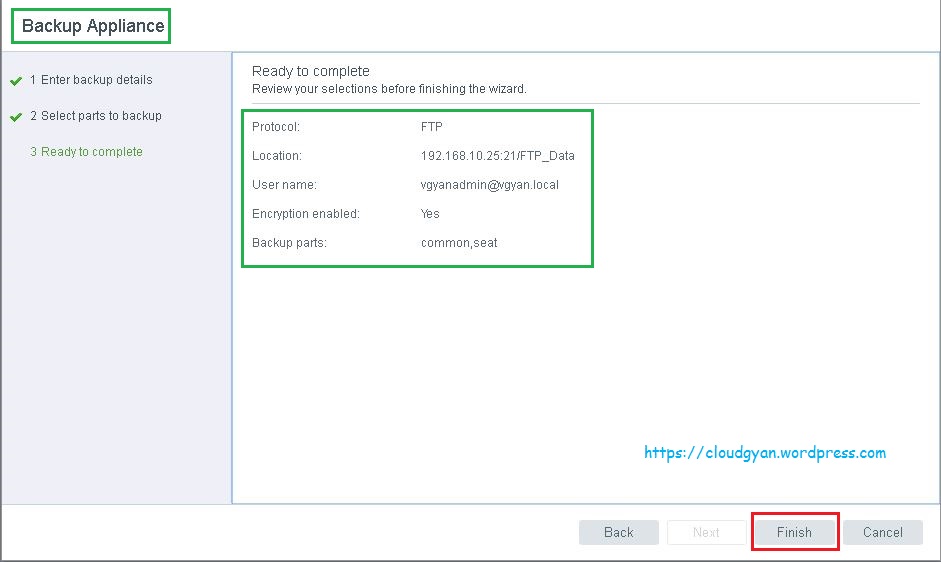
Verify all provided details and click “Finish”.
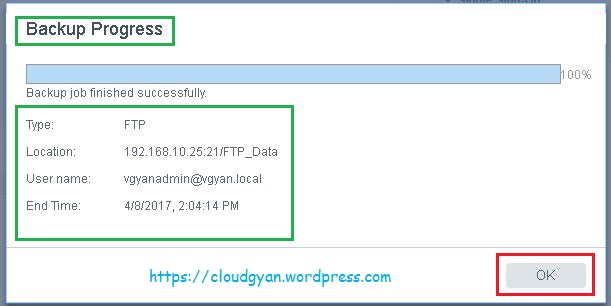
Backup progress, It taken 5min to take the complete backup. It will very according to your vCenter Server, network speed etc..

As you can see below screenshot initiated backup job completed, verify and click “OK”.
Verify the backup files are created/present in your backup repository.
 Now we will check how to deploy a new VCSA 6.5 and restore backup from backup repository.
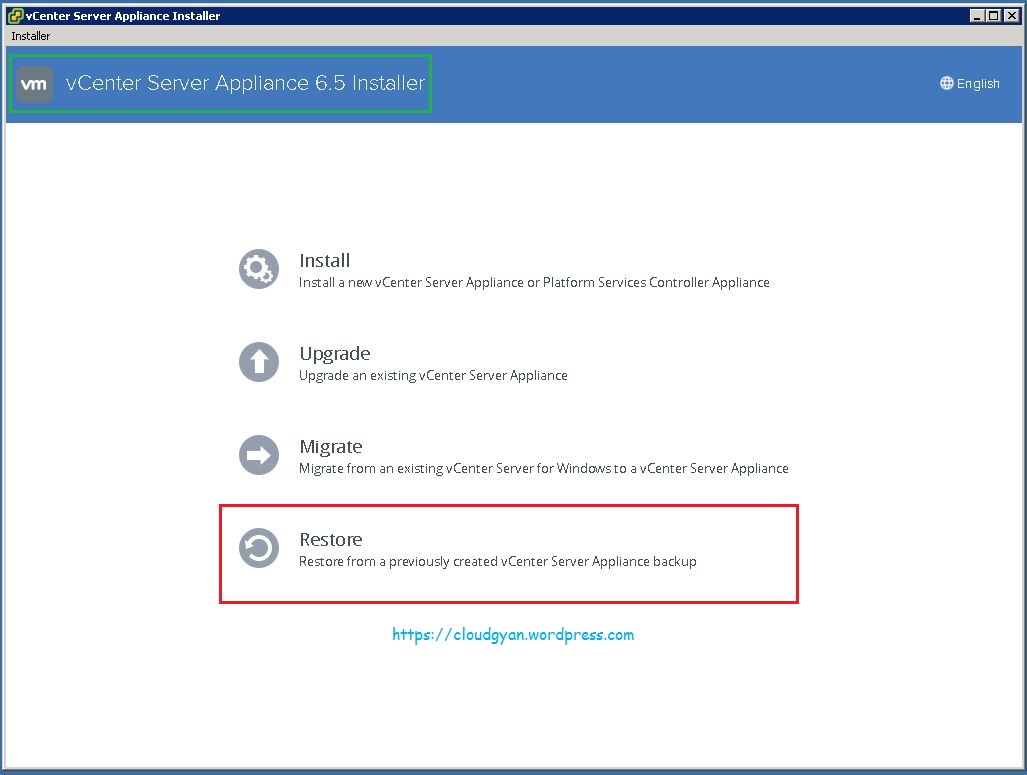
Launch VCSA 6.5 installer from VCSA 6.5 iso.
Here I am going to select “Restore” option:-
As you can see from the screenshot “Restore – Stage 1 :Deploy appliance”
Click “Next” to continue:-

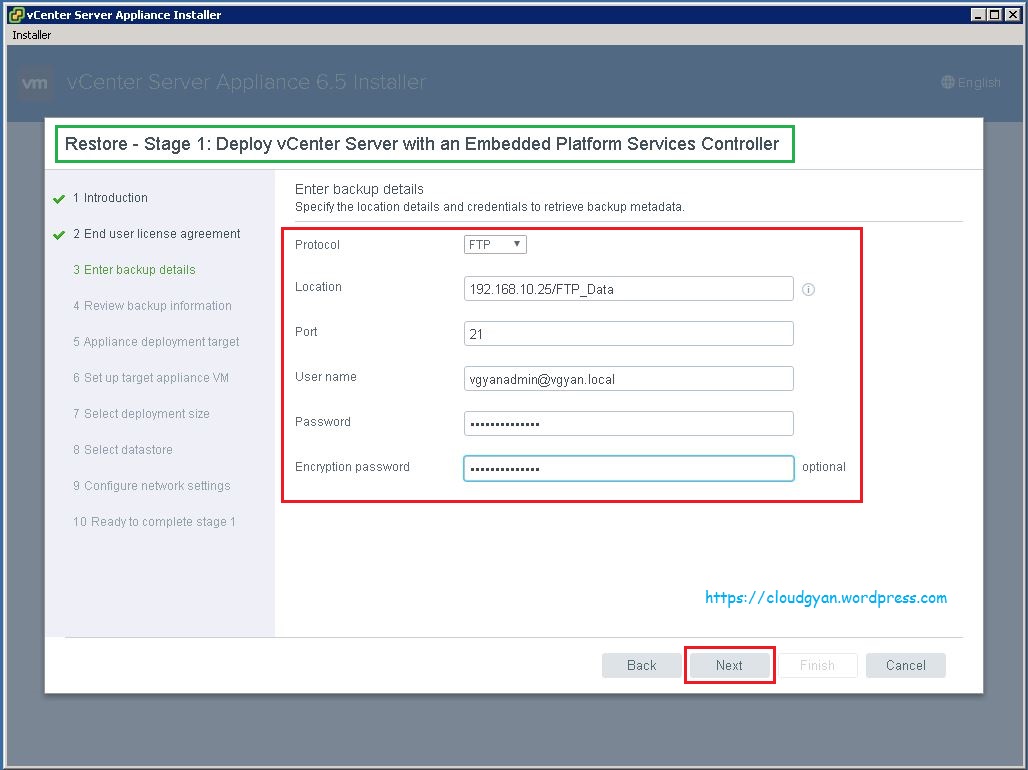
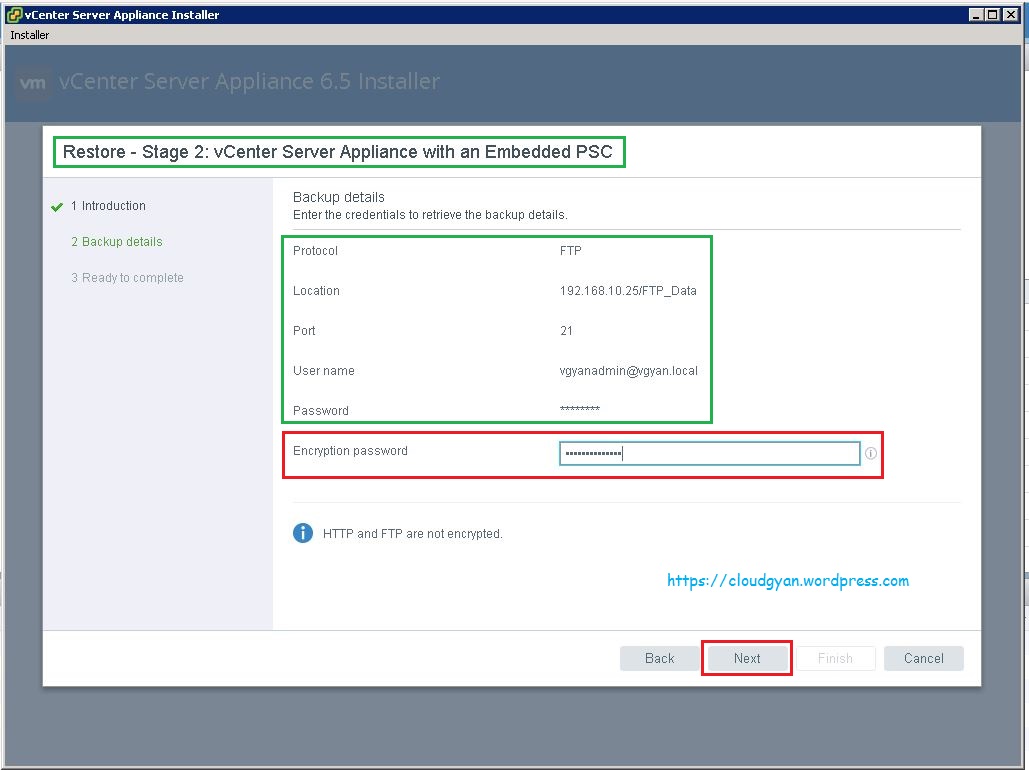
Enter backup details:-
Protocol: FTP ( I am using FTP server for backup repository)
Location: ****
Port: 21
Username: *****
Password: *****
Encryption Password: Password which we given while taking VCSA backup.
Verify all input click “Next” to continue:-
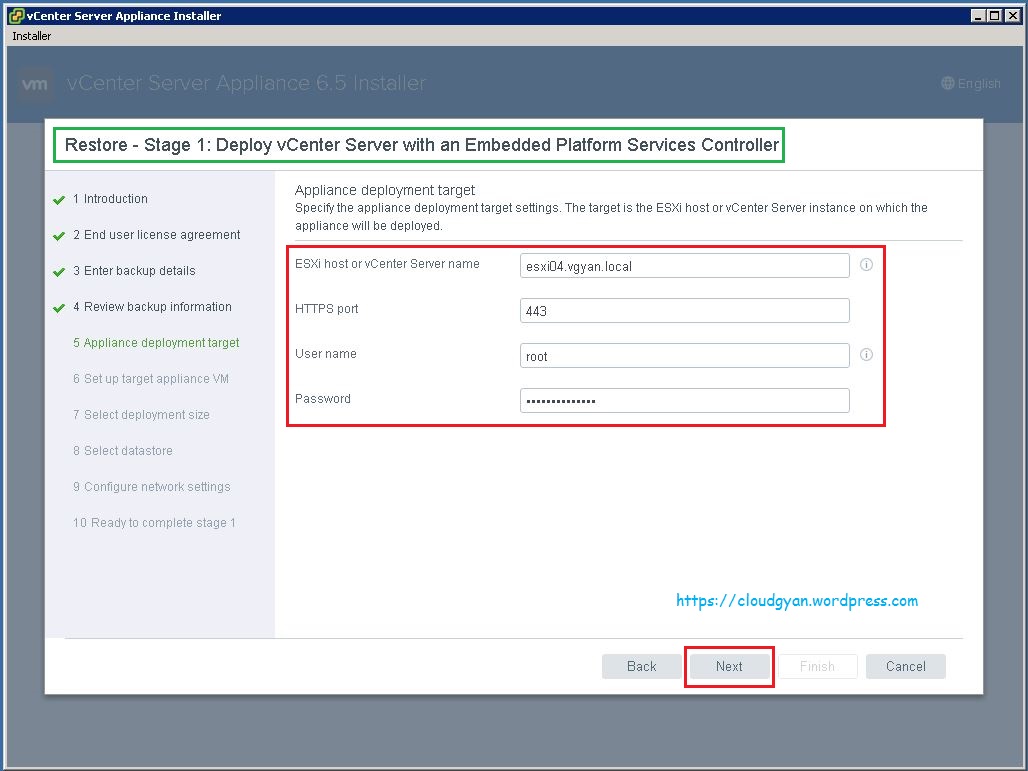
Provide details for appliance deployment target.
ESXi host or vCenter server name: esxi04.vGyan.local
HTTPS Port: 443
User Name: root
Password: ******
Verify all input click “Next” to continue:-
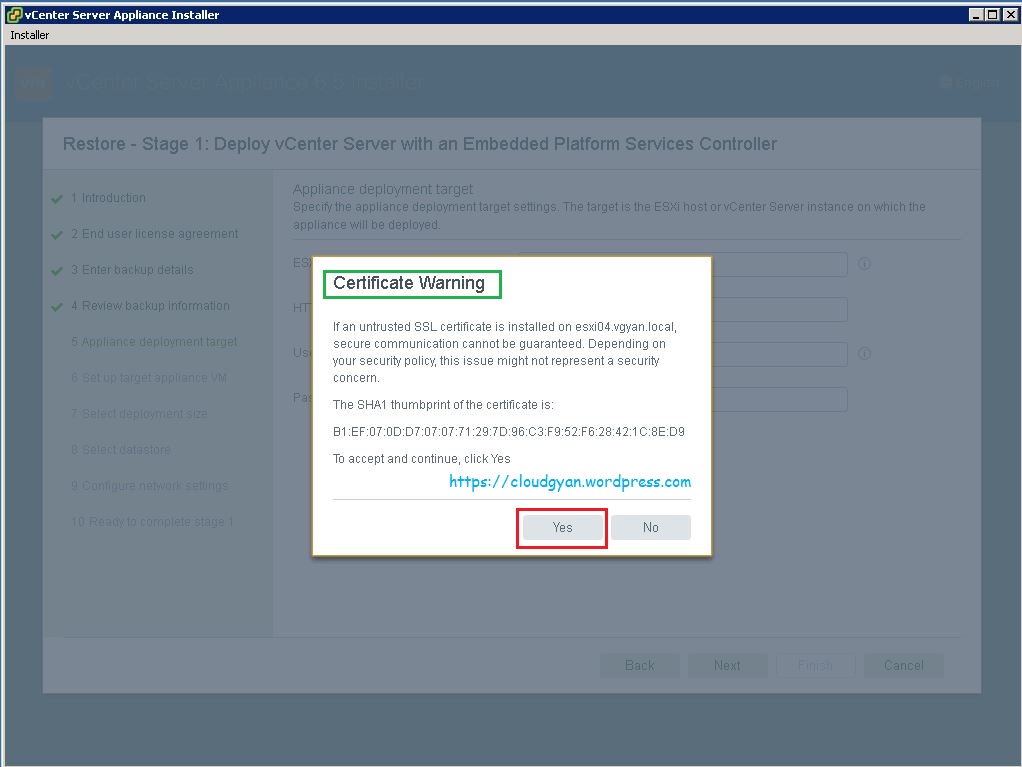
Click “Yes” for SSL certificate:-
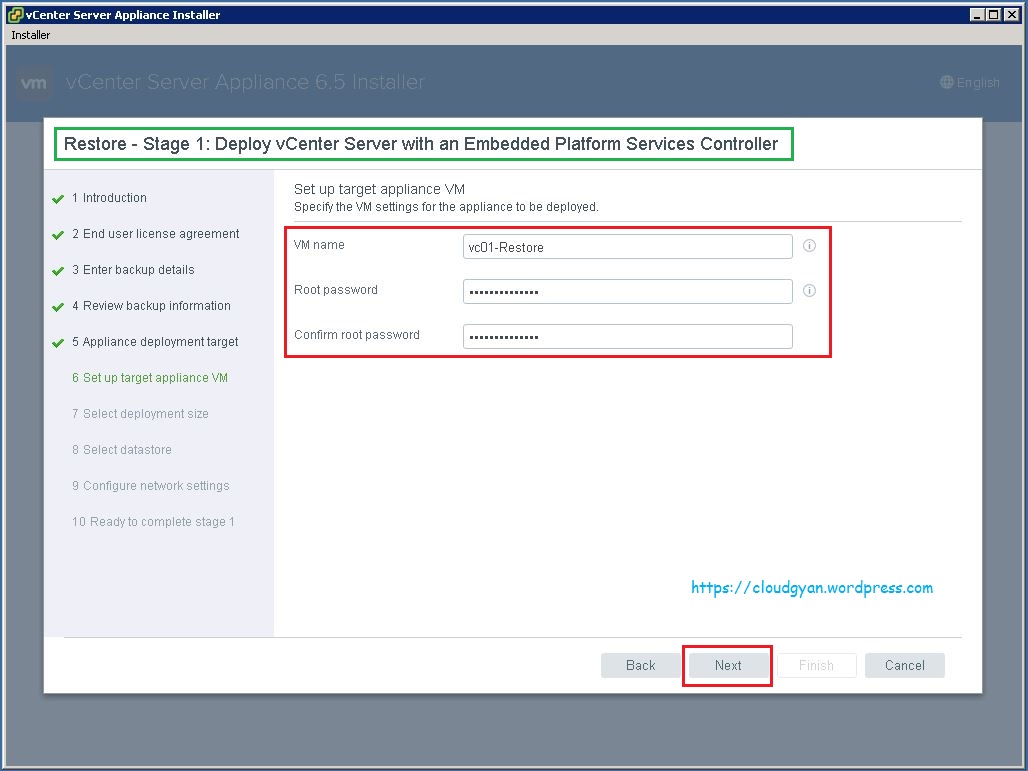
Set up your VCSA appliance VM here:-
VM Name: vc01-Restore
Root Password: password for your appliance
Confirm root password: *****
Click “Next” to continue:-
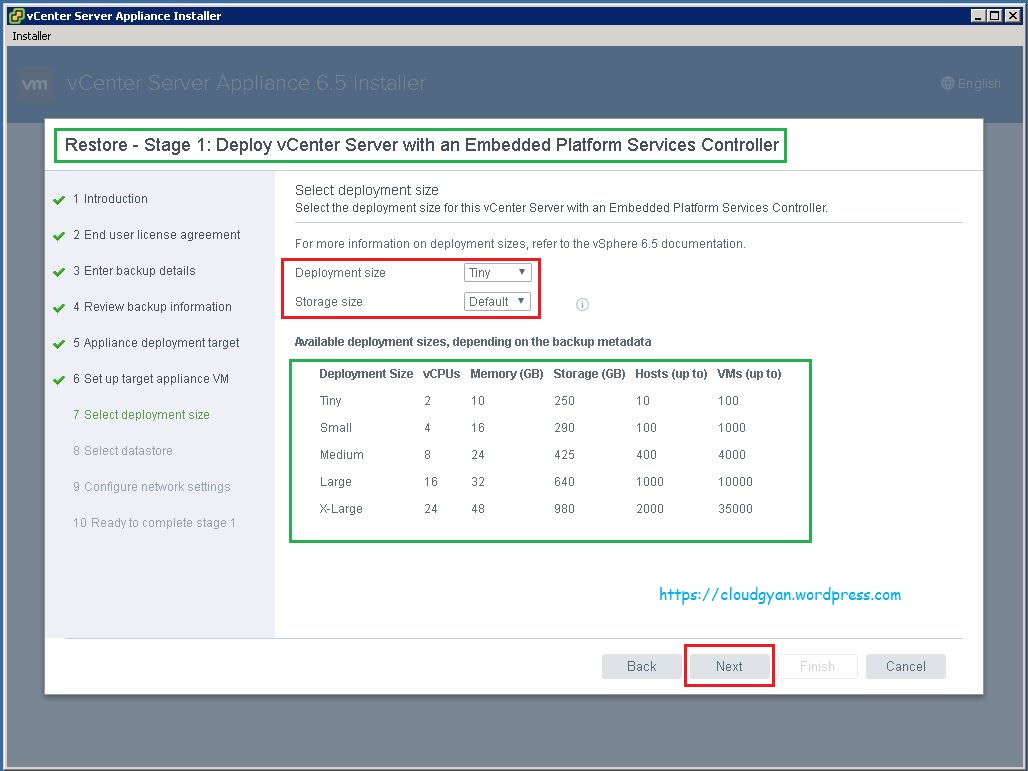
Select deployment size here, I am going with Tiny because it’s a lab environment.
You can select deployment size according to your environment. Please refer the below screenshot for finding best deployment size.
Select and click next to continue:-
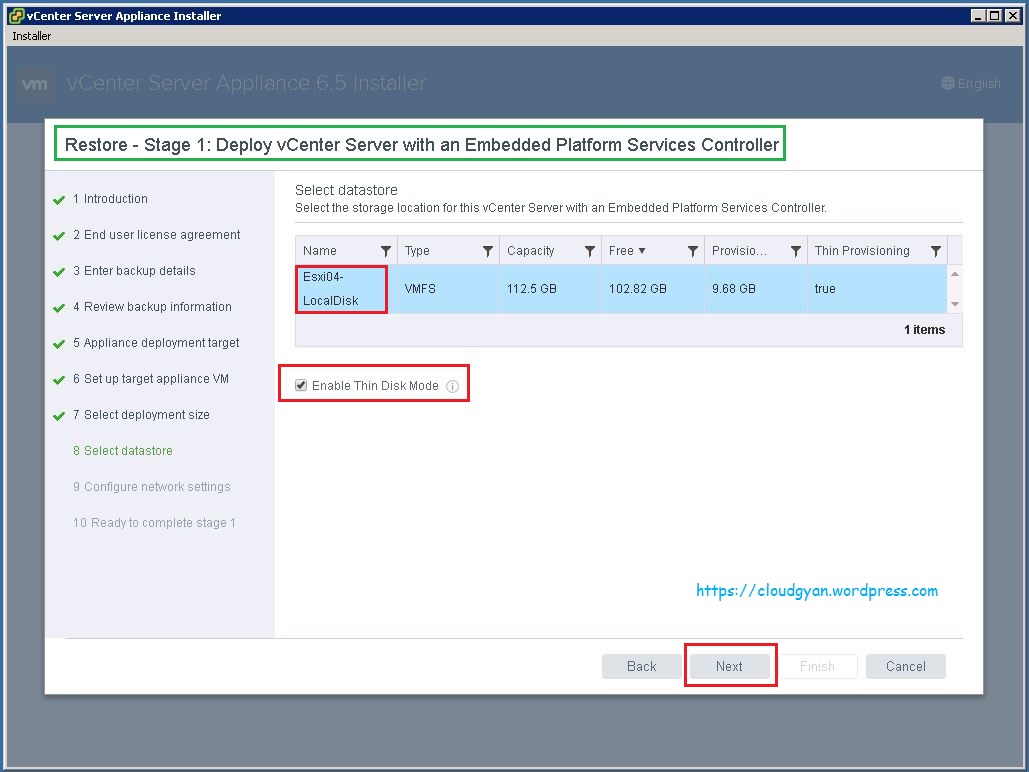
 Select any one of the datastore for your appliance deployment, if you need this in Thin disk mode select enable thin disk option.
Click next to continue:-
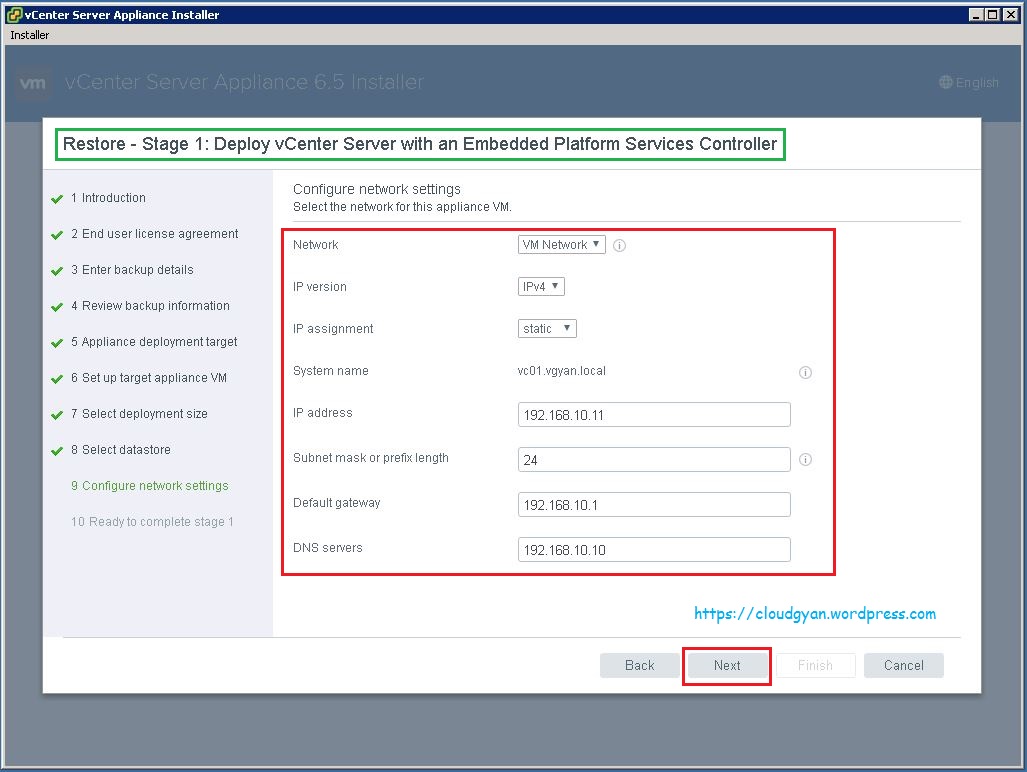
Provide all inputs to configure network settings.
Network: Select your VM network.
IP version: I am using IPv4
System name: vc01.vgyan.local
IP address: 192.168.10.11
Subnet mark or prefix length: using 24
Default gateway: 192.168.10.1
DNS server: 192.168.10.10
Verify all the details, make sure you have a valid DNS entry in DNS server with same hostname and IP.
Click Next to continue:-
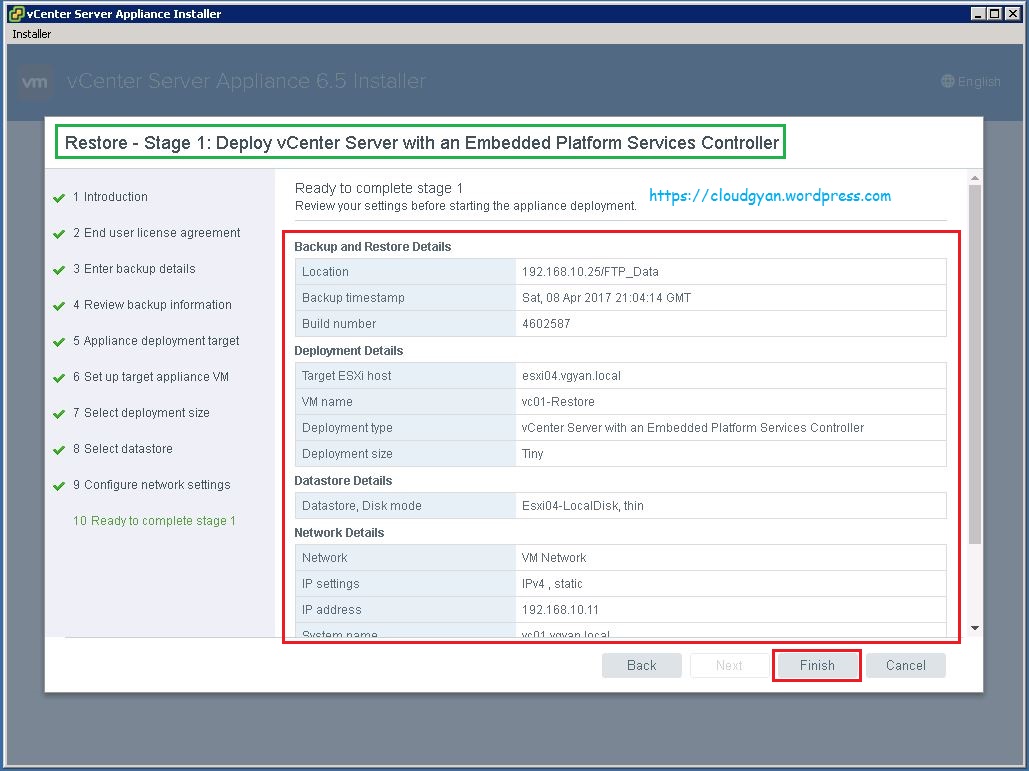
Verify all the details and click on Finish.
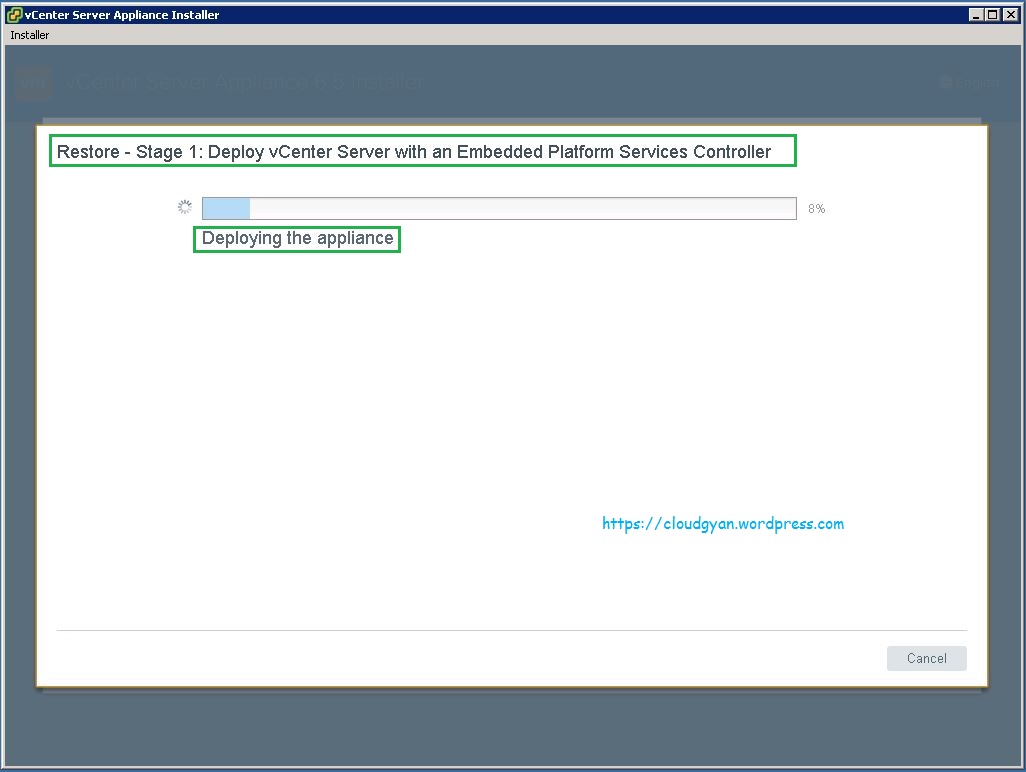
Appliance deployment started, it’s taken around 10min time in my lab environment.
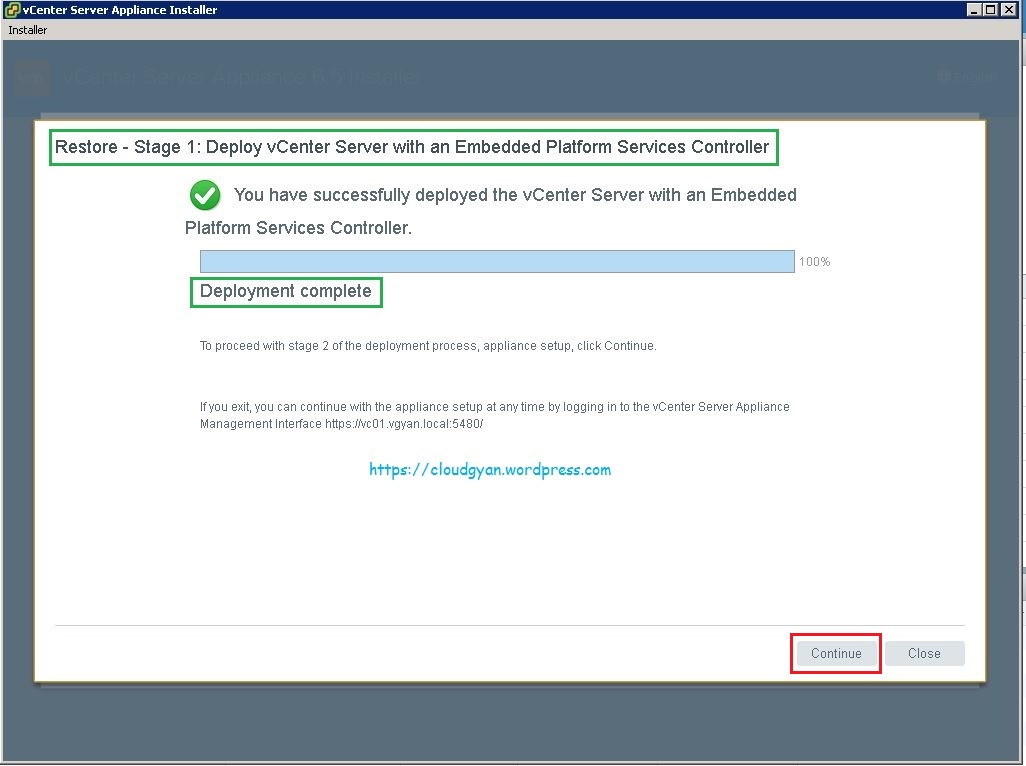
Below screenshot says that VCSA 6.5 successfully deployed on top of esxi host.

We have completed Restore – Stage 1 Appliance deployment.
Click Continue for Stage – 2
Click next to continue:-

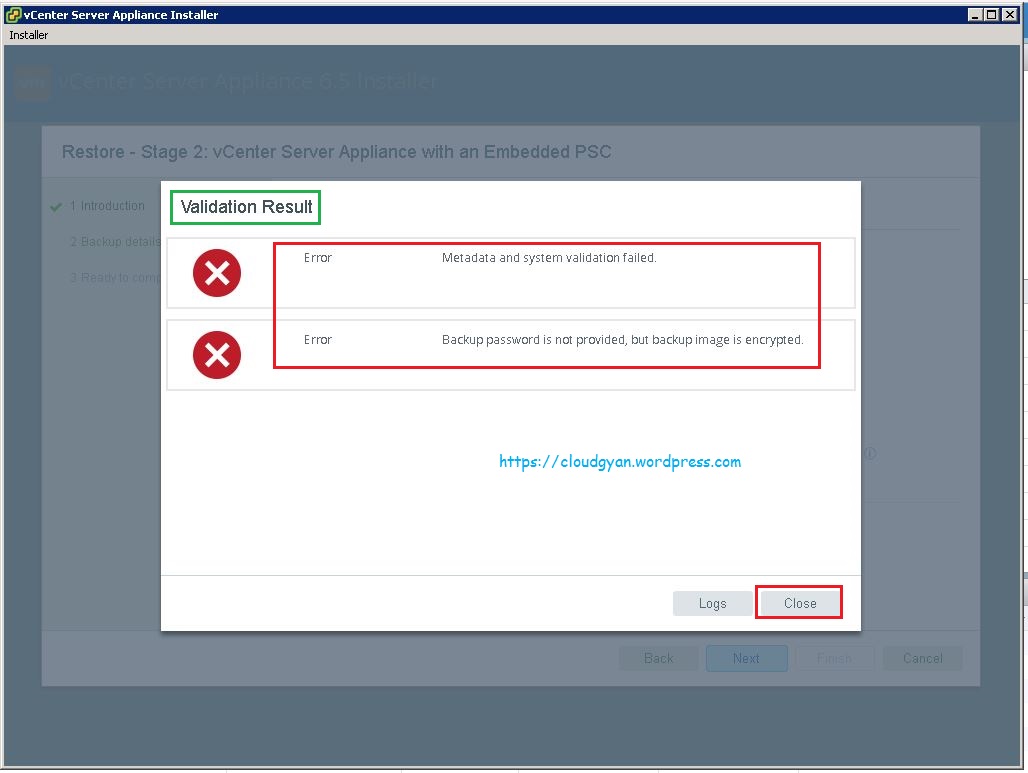
We have two error here,
1. Metadata and system validation failed.
2. Backup password is not provided, but backup image is encrypted.
So we have to provide the backup password for restoring the backup data.
Select Close in the Validation Result filed.
Verify backup repository information and provide your backup encryption password in the password field.
Click next to continue:-
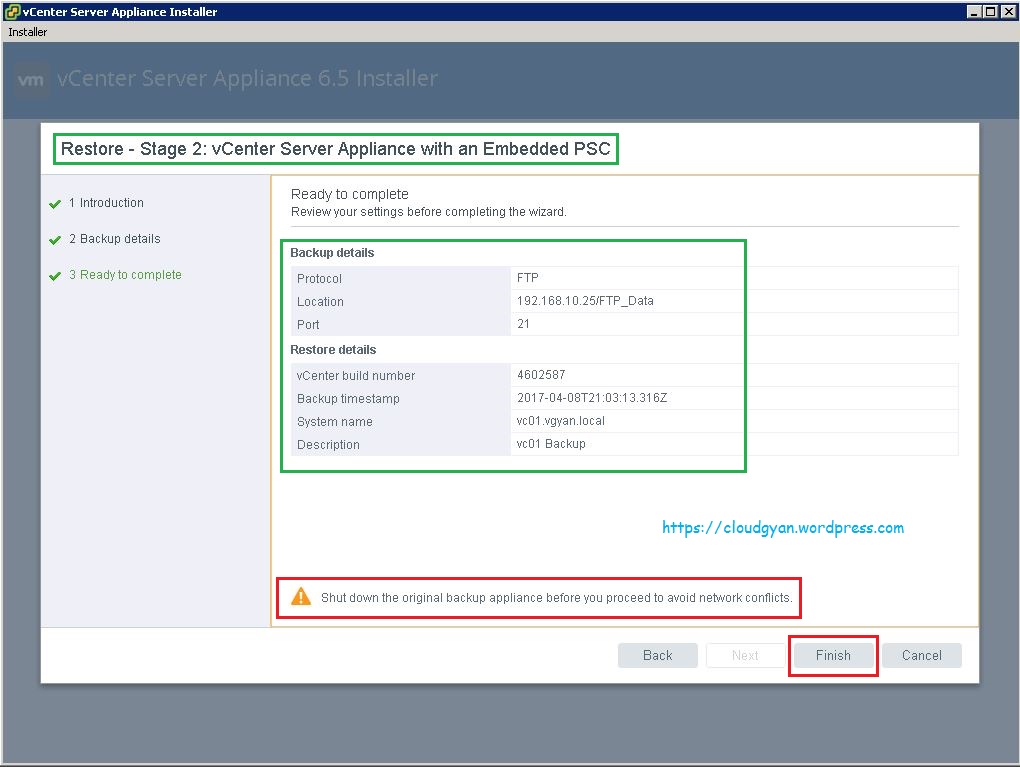
Verify all the details before clicking Finish button.
Make sure you are shut down the original backup appliance before you proceed to avoid network conflict.
Click Finish to continue:-
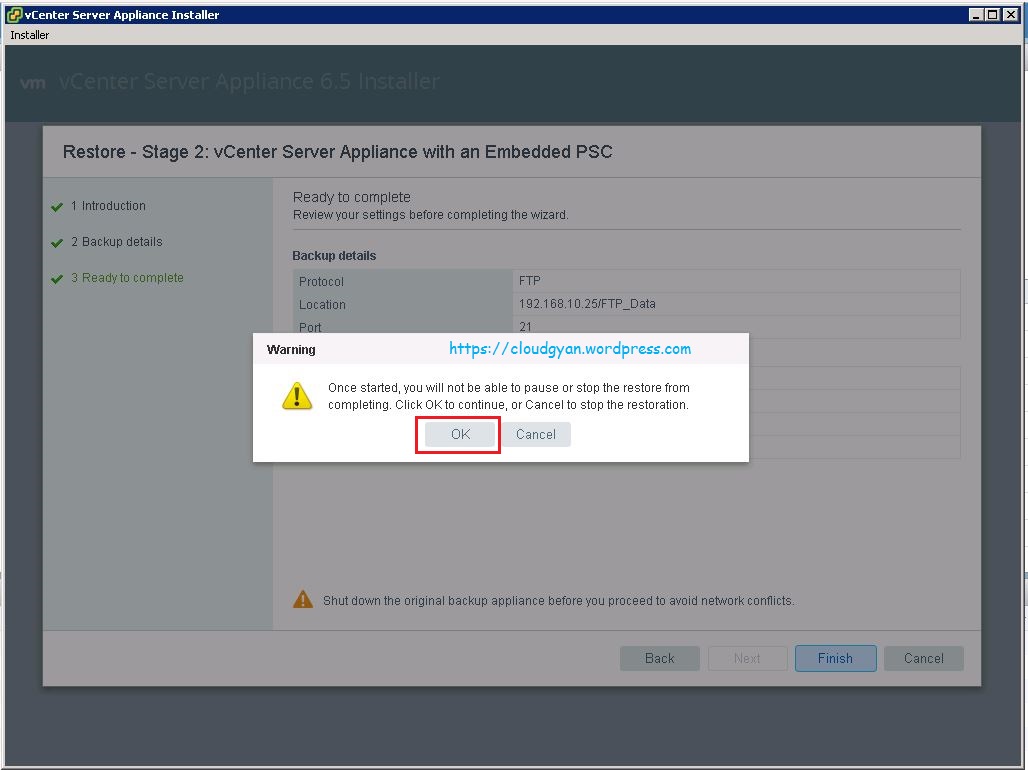
Warning:- Once you started, you will not be able to pause or stop the restore from completing.
Click OK to proceed:-
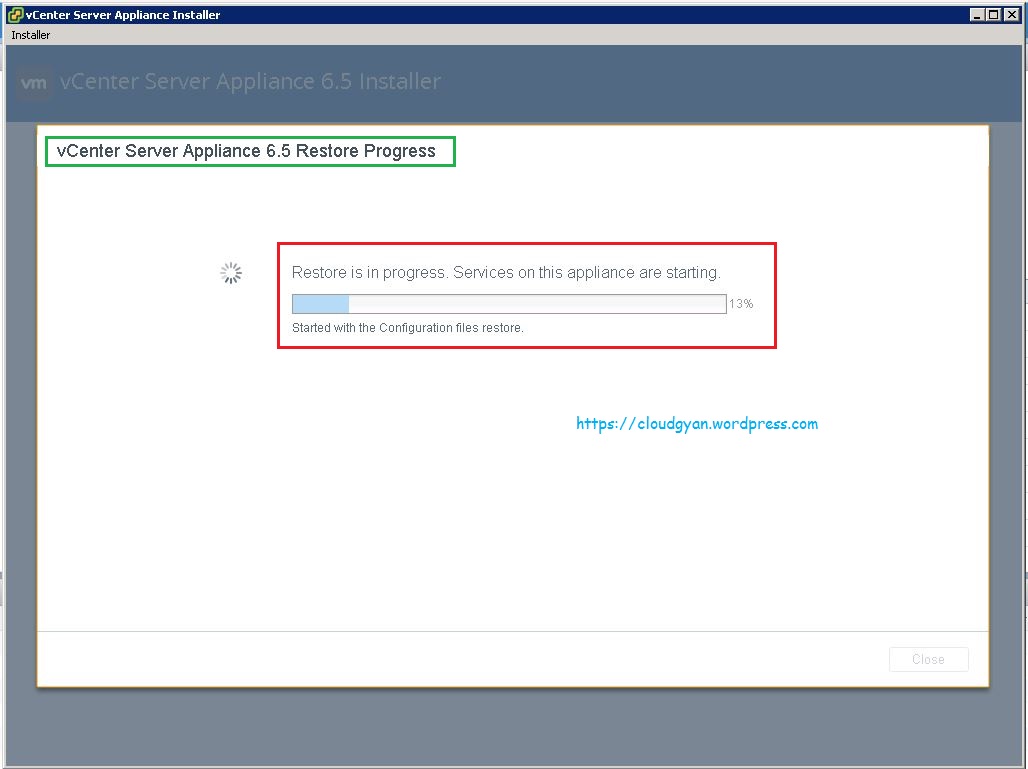
Restoration in progress, it’s taken 10 to 15 min in my lab environment.
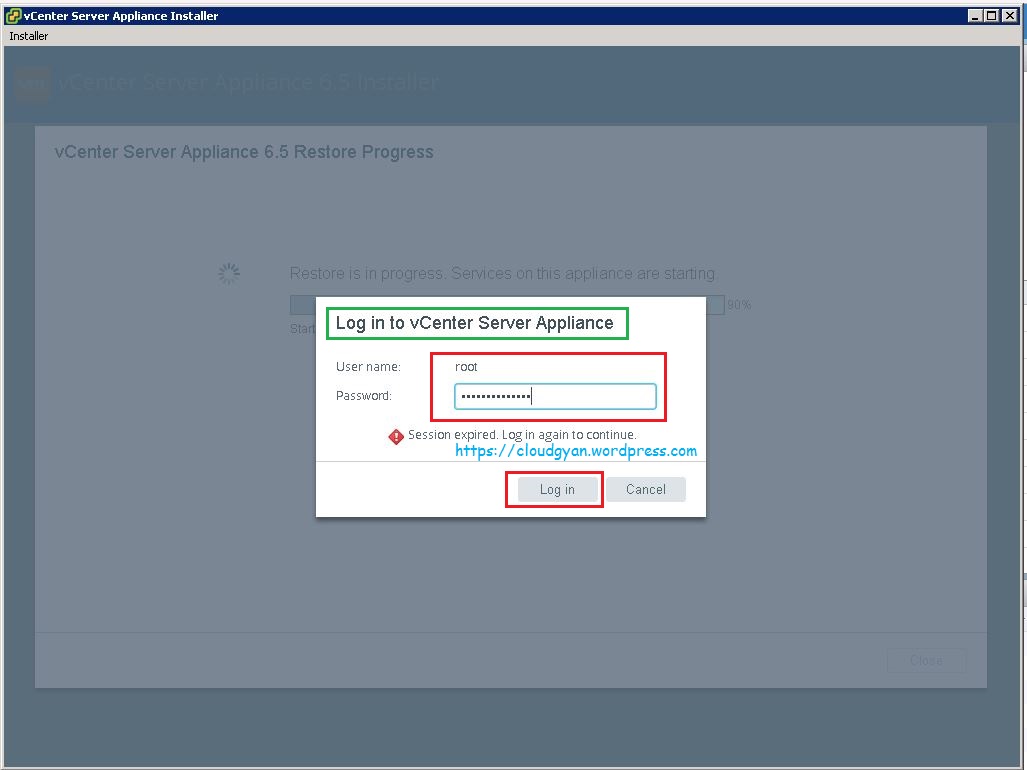
 Once the network reconfigure, we need to re login to the appliance with root credentials.
Provide your root password and click on Log in.
We successfully restored the appliance from backup.
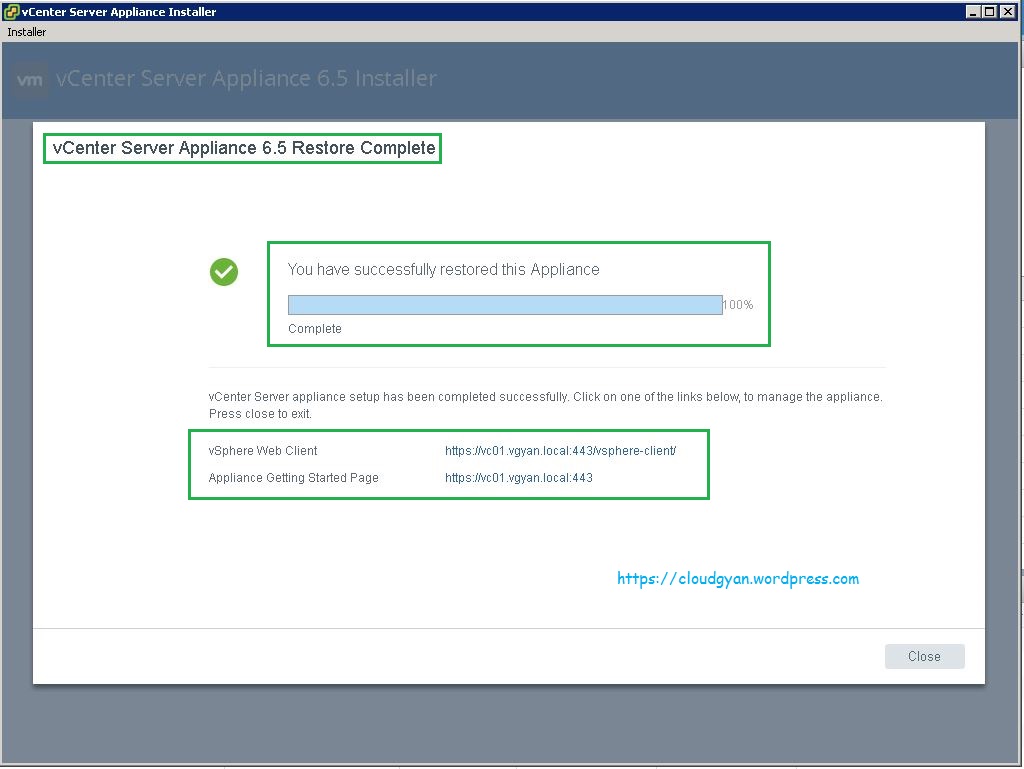
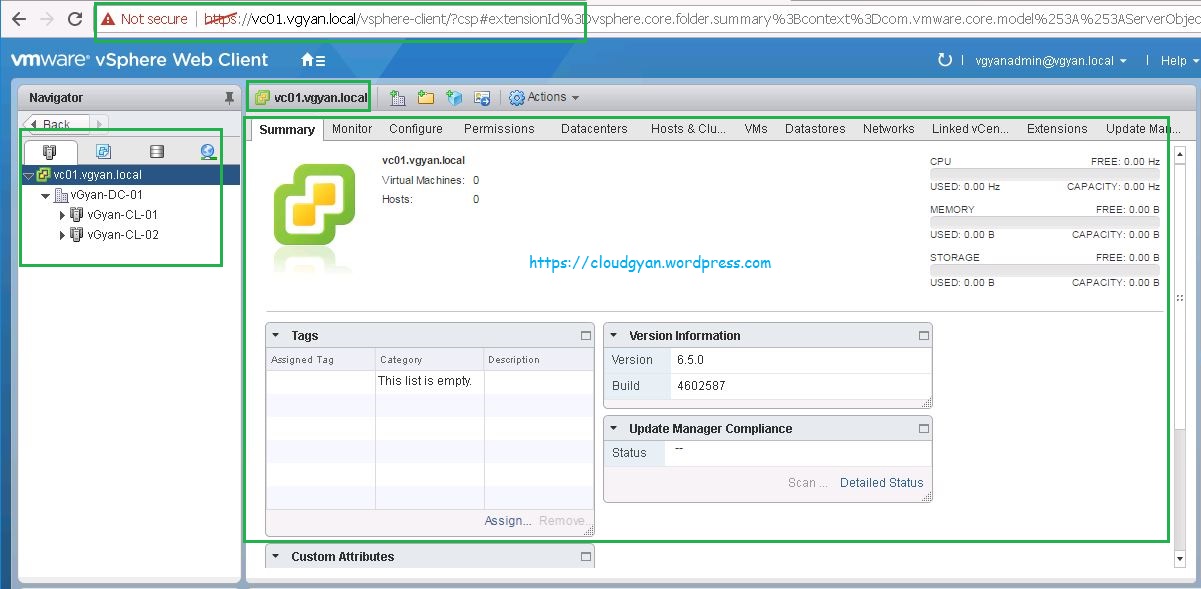
As you can see below, vc01.vgyan.local is up and running.
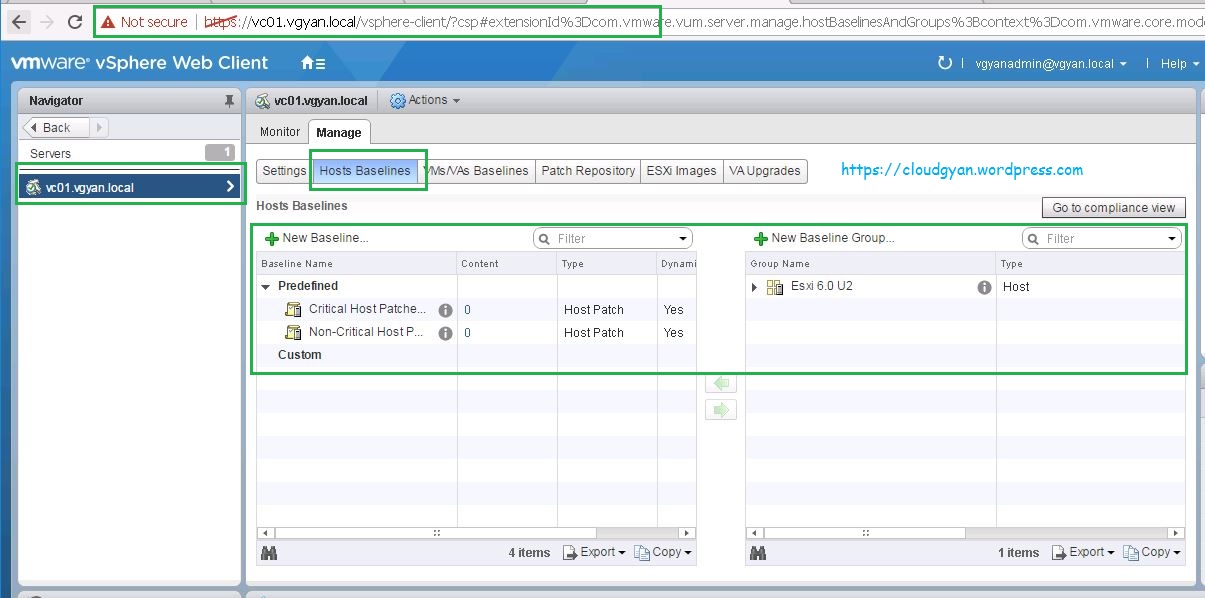
For testing purposes I created one Baseline Group “Esxi 6.0 U2” in my update manager and uploaded esxi host ISO before taking backup.
Below screenshot says after restoration baseline group Esxi 6.0 U2 is available in the update manager but the ISO image is not.
I hope you enjoyed reading this post. Feel free to share this to others if it is worth sharing!!!
If you have an external PSC, hows that backed up and restored, please explain, and/or create a new post about it
Thanks for your question, I will write a new post on the same…
Hi,
WHat happens to the Original VCSA? can it be deleted/removed?
Thanks.
Hi,
We can delete the old appliance..