How to Install Zerto ZVM 5.0 for vSphere Environment
Hi all,
Today we will discuss about how to install Zerto Virtual Manager (ZVM)
In my previous post we discussed about introduction to Zerto Virtual Replication.
I am doing this testing on my lab environment, below image shows how I created my VMware lab environment for this testing.
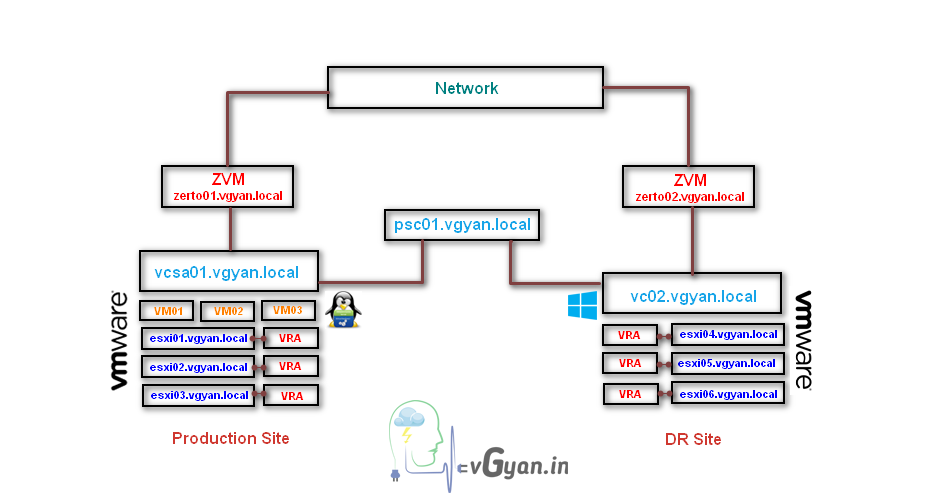 Lab environment created for Zerto VMware to VMware DR test.
I have created two windows VM’s for installing ZVM in both protected and recovery sites. Both VM’s are having 2 vCPU, 4 GB RAM, 100GB HDD and its running on windows server 2012 R2.
Before proceeding for Zerto ZVM installation you should have a valid license from Zerto. Once you register for Zerto trail, with welcome mail you will receive a 14 days test license and 24 hr valid software download link.
Registering for Zerto trail Click Here
Note: make the testing environment ready before requesting test license. Zerto will provide only 14 days of trail license per organization.
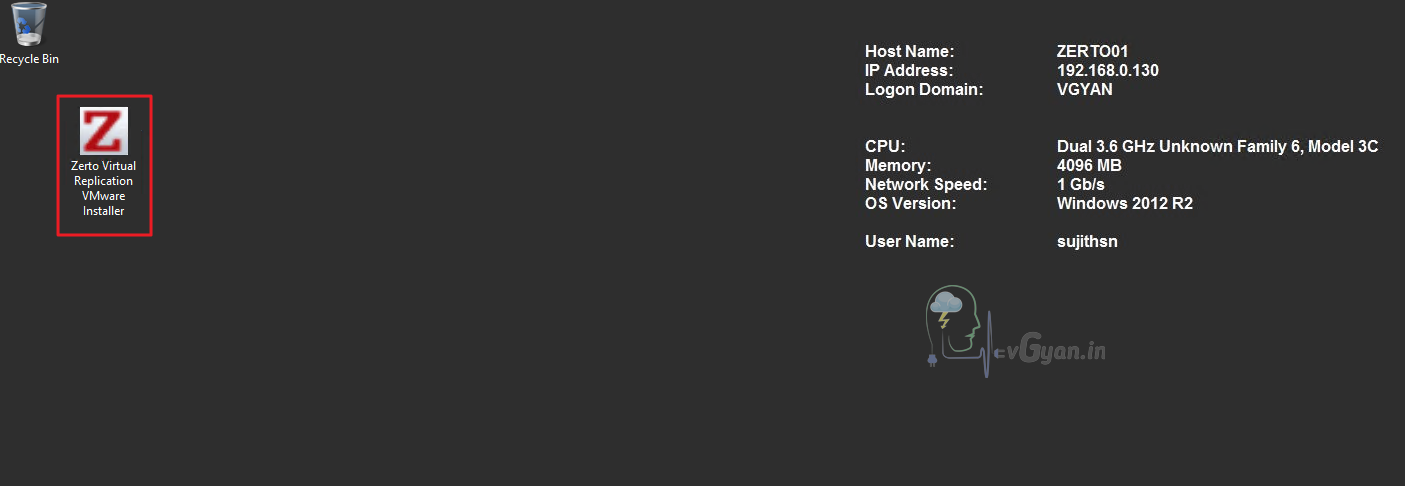
I have downloaded Zerto ZVM installation software 5.0 for VMware vSphere environment.
open the ZVM installation software.
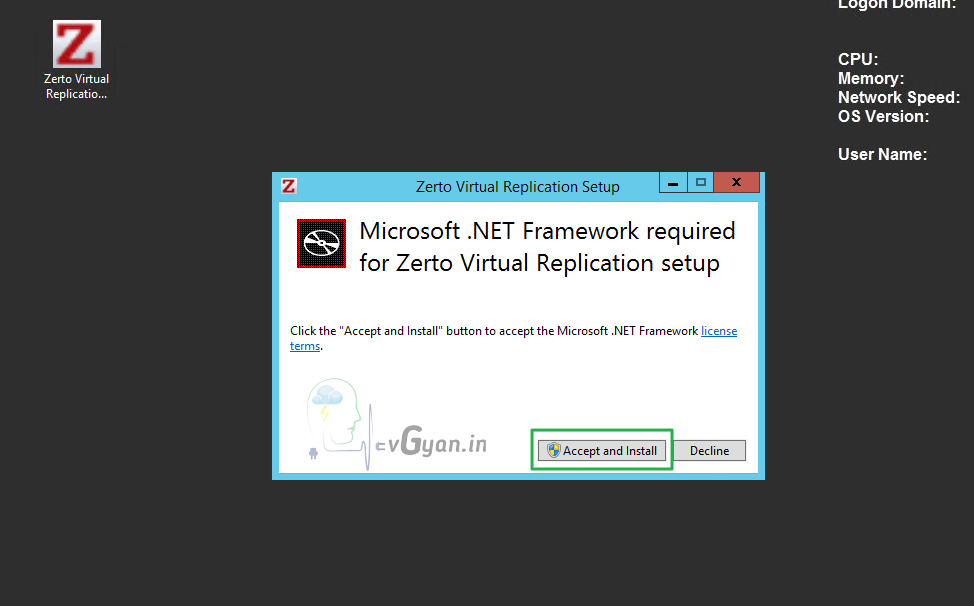
I don’t have a .NET Framework running on this server, so accepting and installing .NET Framework.
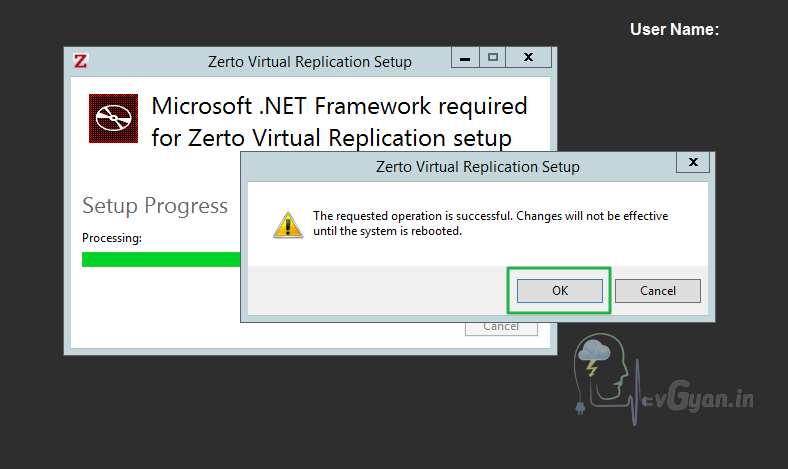
Once the .NET installation completed, we need to reboot the server once.
Click OK for reboot.
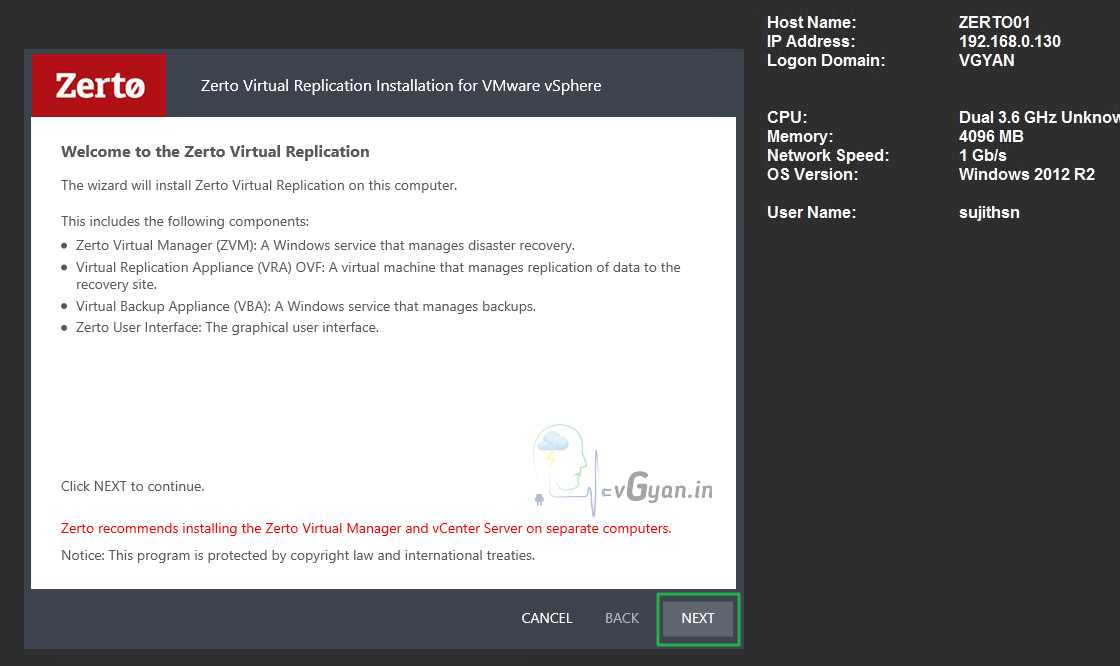
Once the reboot competed, ZVM installation software opened on the server.
Click next to continue:-
Accept the license agreement and click Next to continue:-

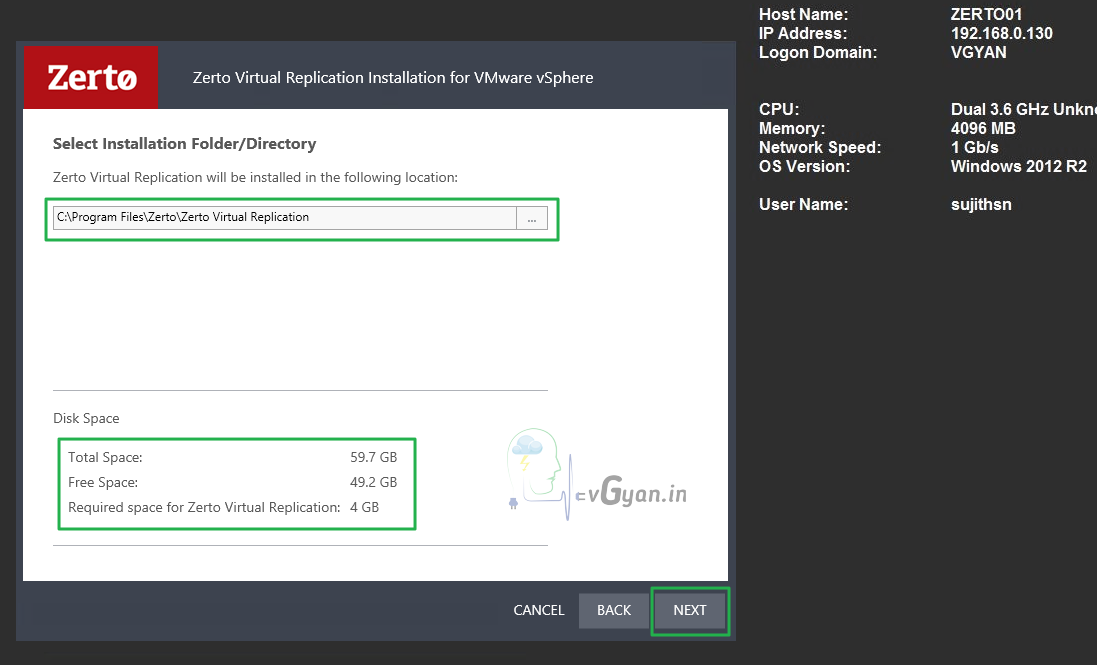
Select the installation folder, minimum 4GB disk space needed for ZVM installation.
Click Next to continue:-
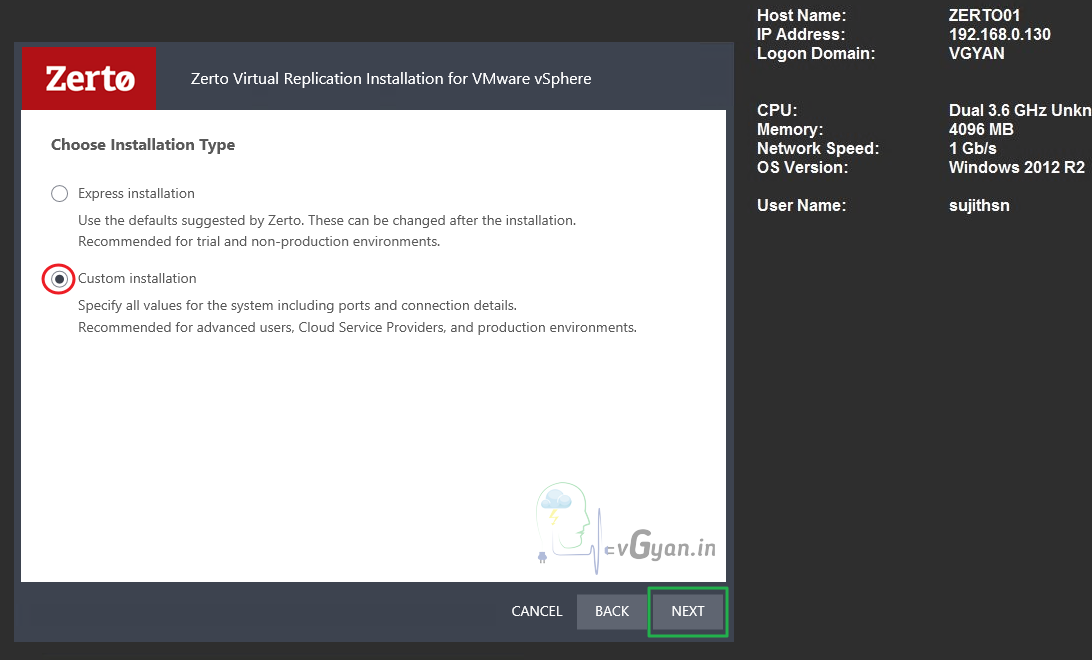
This installation I am performing for protected site, so I am going with Custom Installation here, for recovery site we will try Express Installation.
Select custom installation and click Next to continue:-
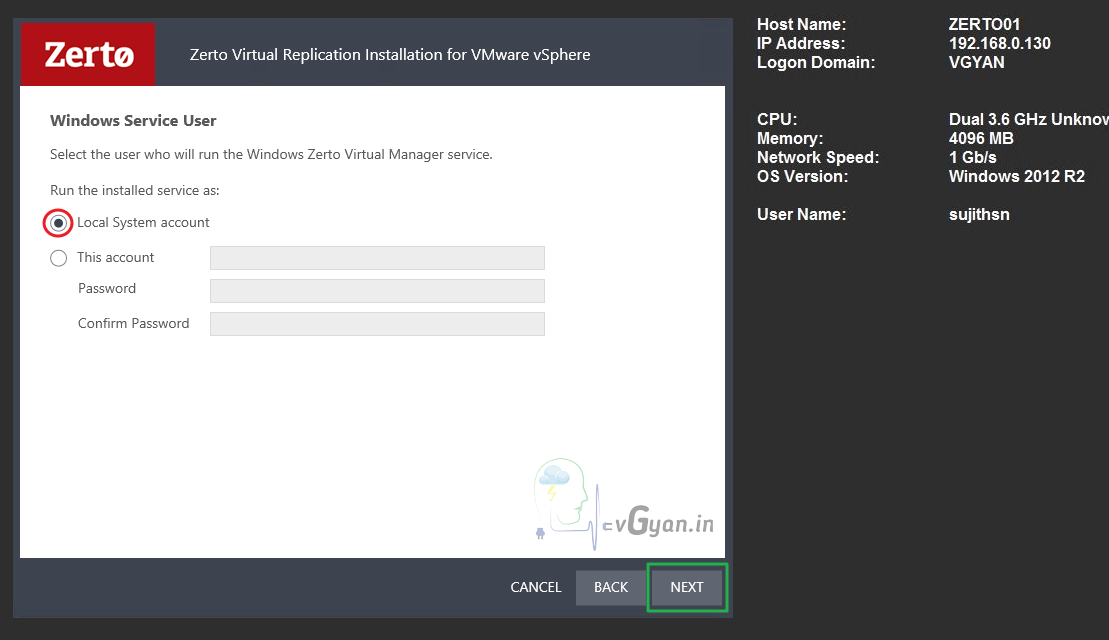
I am selecting local system account as my windows service user. For production environment we should use service accounts for best practice.
Click Next to continue:-
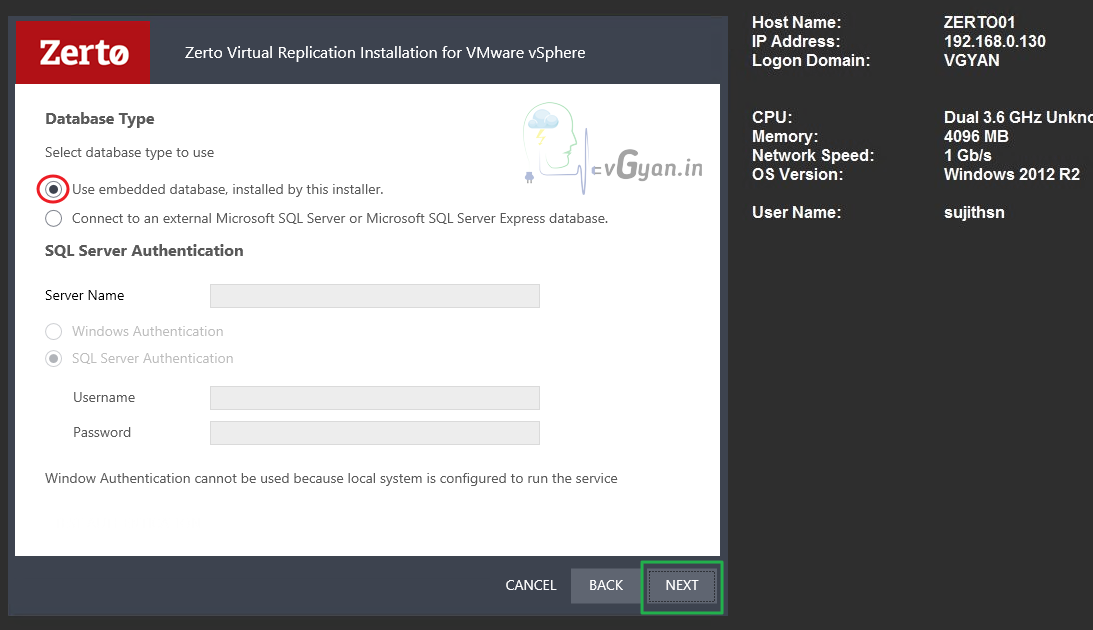
Zerto ZVM needs a database connection, we can use external Microsoft SQL server or Microsoft SQL Server database.
I am going with embedded database, if you are planning zerto for a large environment go for external Windows SQL server.
Select “Use embedded database” and click Next to continue:-
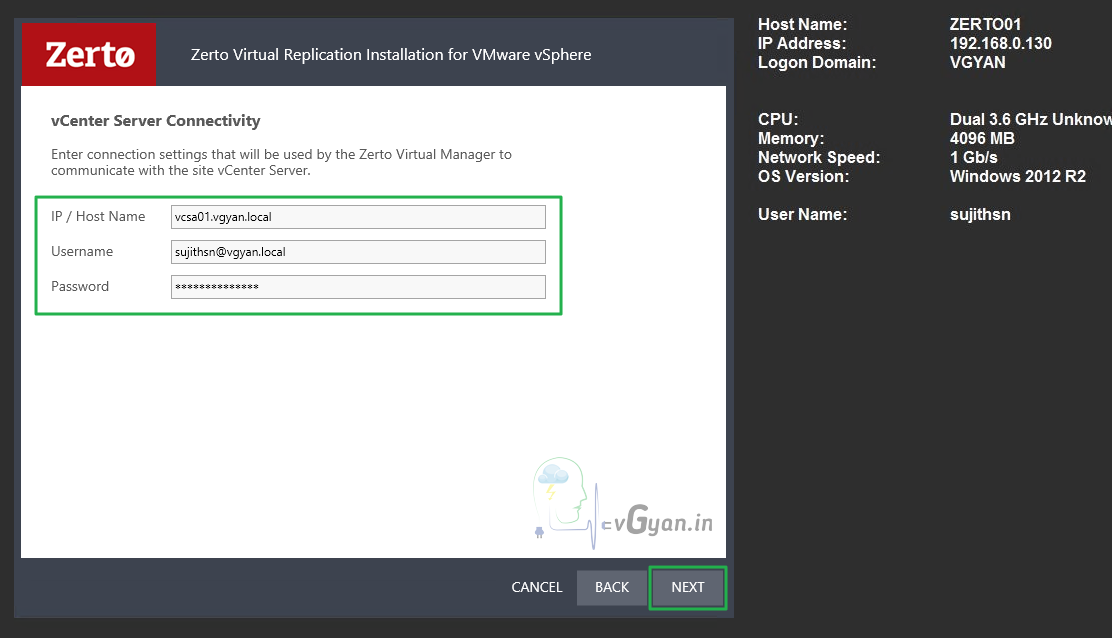
Provide vCenter Server connection details,
IP/Host Name: vcsa01.vgyan.local
Username: sujithsn@vgyan.local (administrator access)
Password: ******
Click Next to continue:-
I don’t have a vCloud director running on my environment, it’s an option ZVM can communicate with vCD also.
Click Next to continue:-

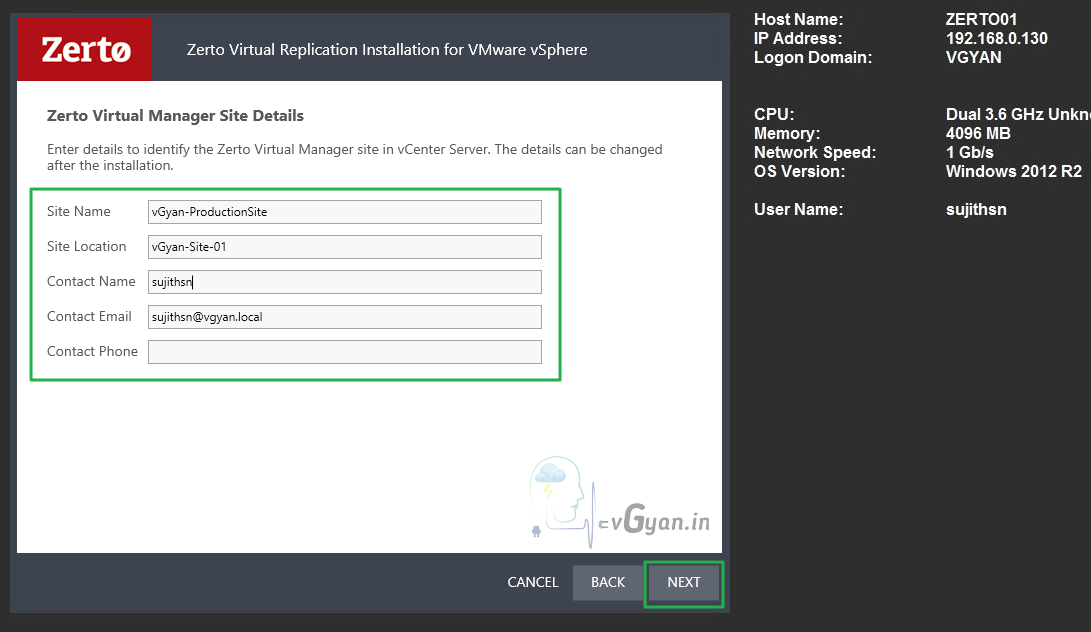
Provide ZVM site details, I am installing this site for protected environment.
Site Name: vGyan-ProductionSite
Site Location: vGyan-Site-01
Contact Name: sujithsn
Contact email: ****
Contact phone: *****
Click Next to continue:-
Make sure all the required ports are open.
HTTP port (ZVM) : 9080
HTTPS Port (clients <-> ZVM) : 9669
TCP Port (ZVM <-> ZVM) : 9081
TCP Port (ZVM -> VBA) : 9108
Click Next to continue:-

Zerto providing online services and Zerto mobile application, if you want to monitor your zerto environment over the mobile enable online services and mobile application option and click Next to continue:-

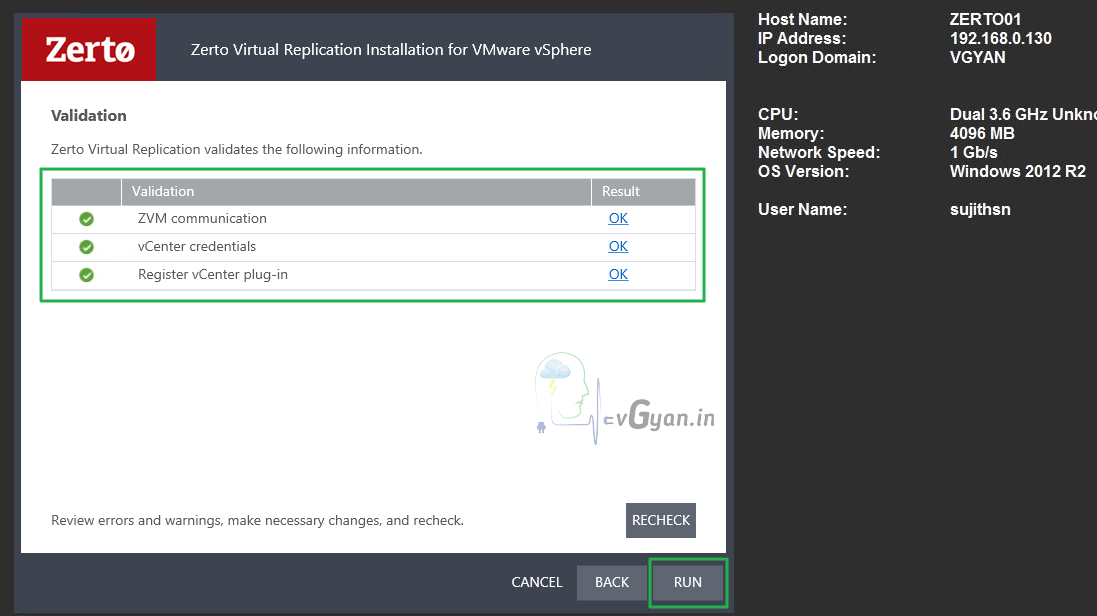
Installer will validate all the provided information.
- ZVM communication
- vCenter credentials
- Register vCenter plug-in
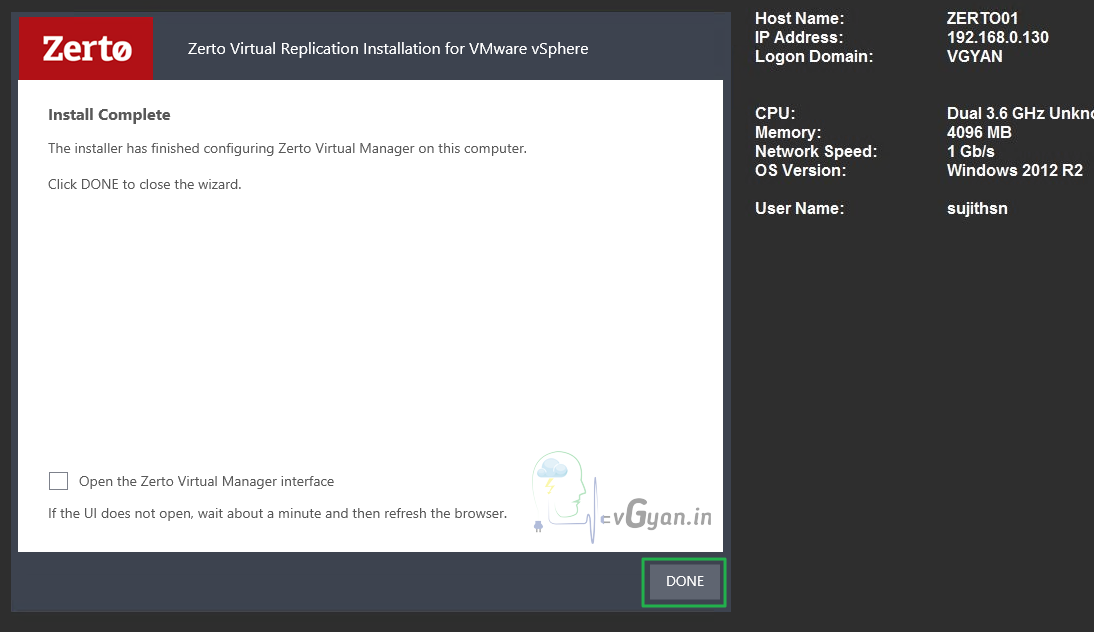
Once all the validation succeeded, click on RUN to start the installation.
Installation completed select Done for closing the installer.
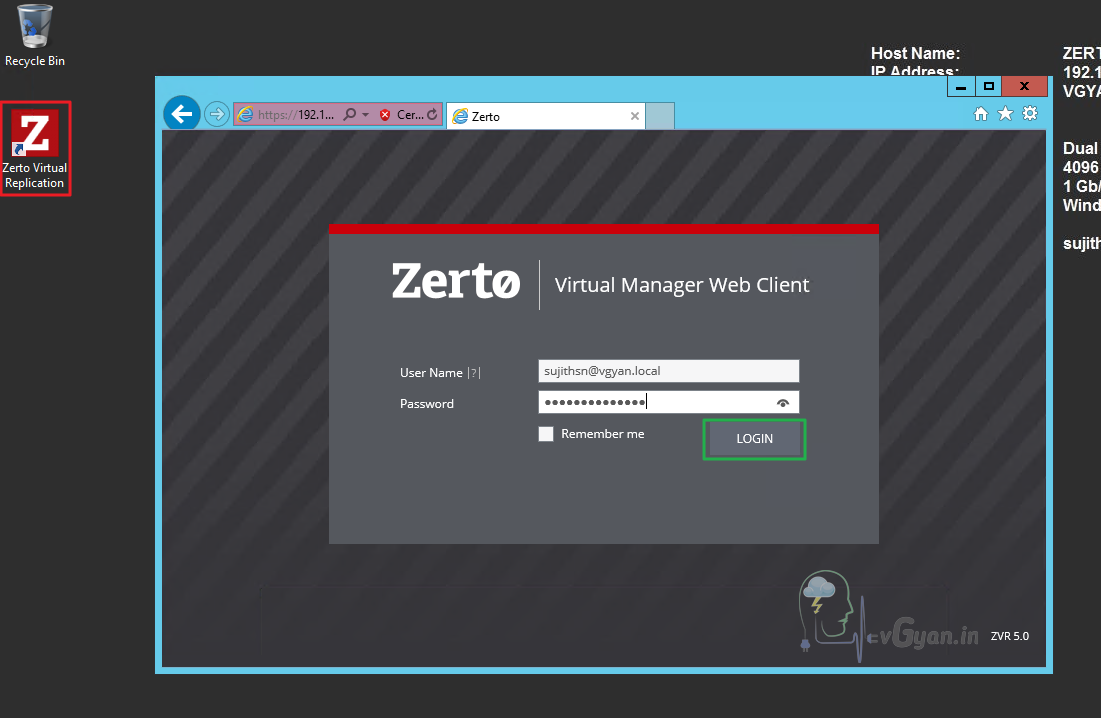
For accessing ZVM Web Client, open any web browser go to https://FQDN or IP:9669
For me its https://zerto01.vgyan.local:9669
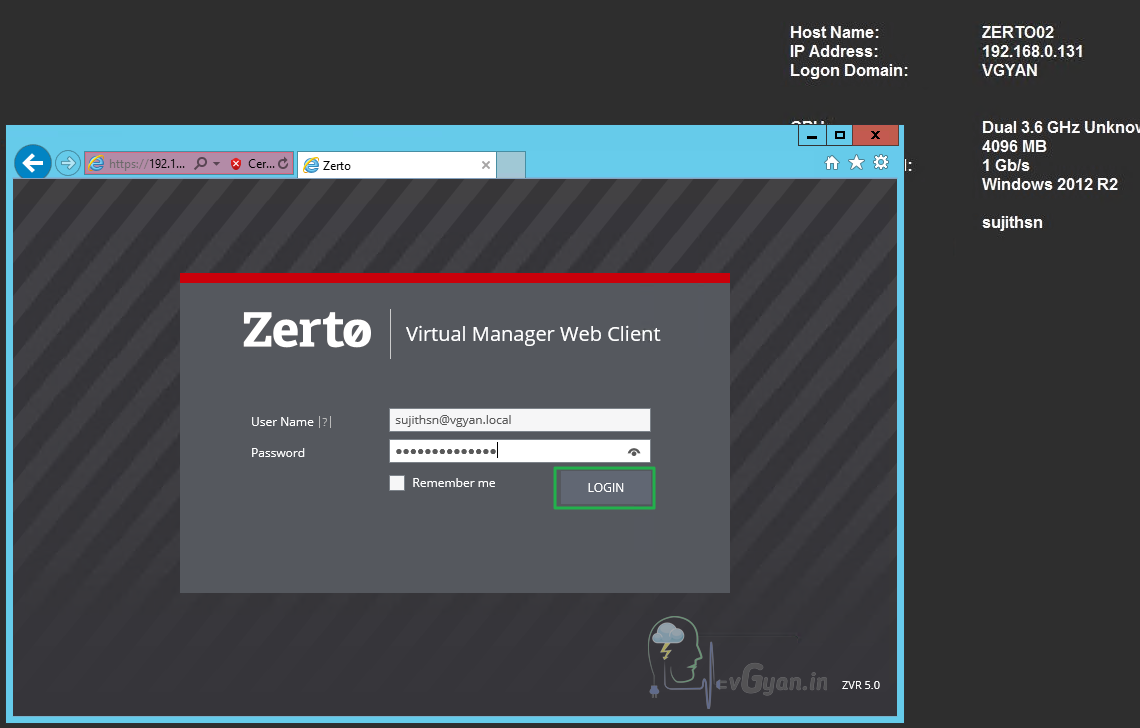
Once the Virtual Manager Web Client opens provide the vCenter credentials which we provided on the installation phase.
Click on LOGIN.
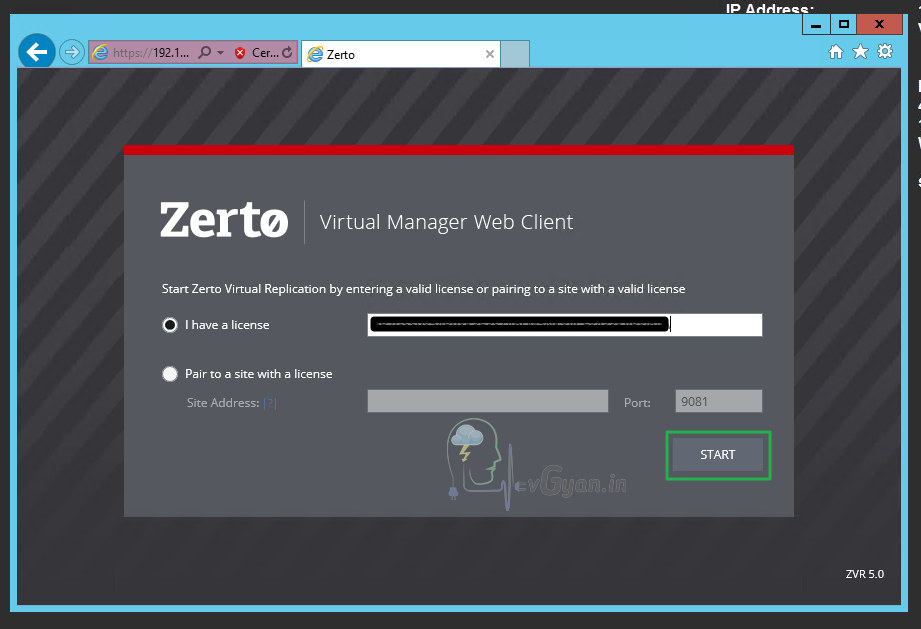
Provide the Zerto license key and Select START. without a valid key we can’t login to ZVM.
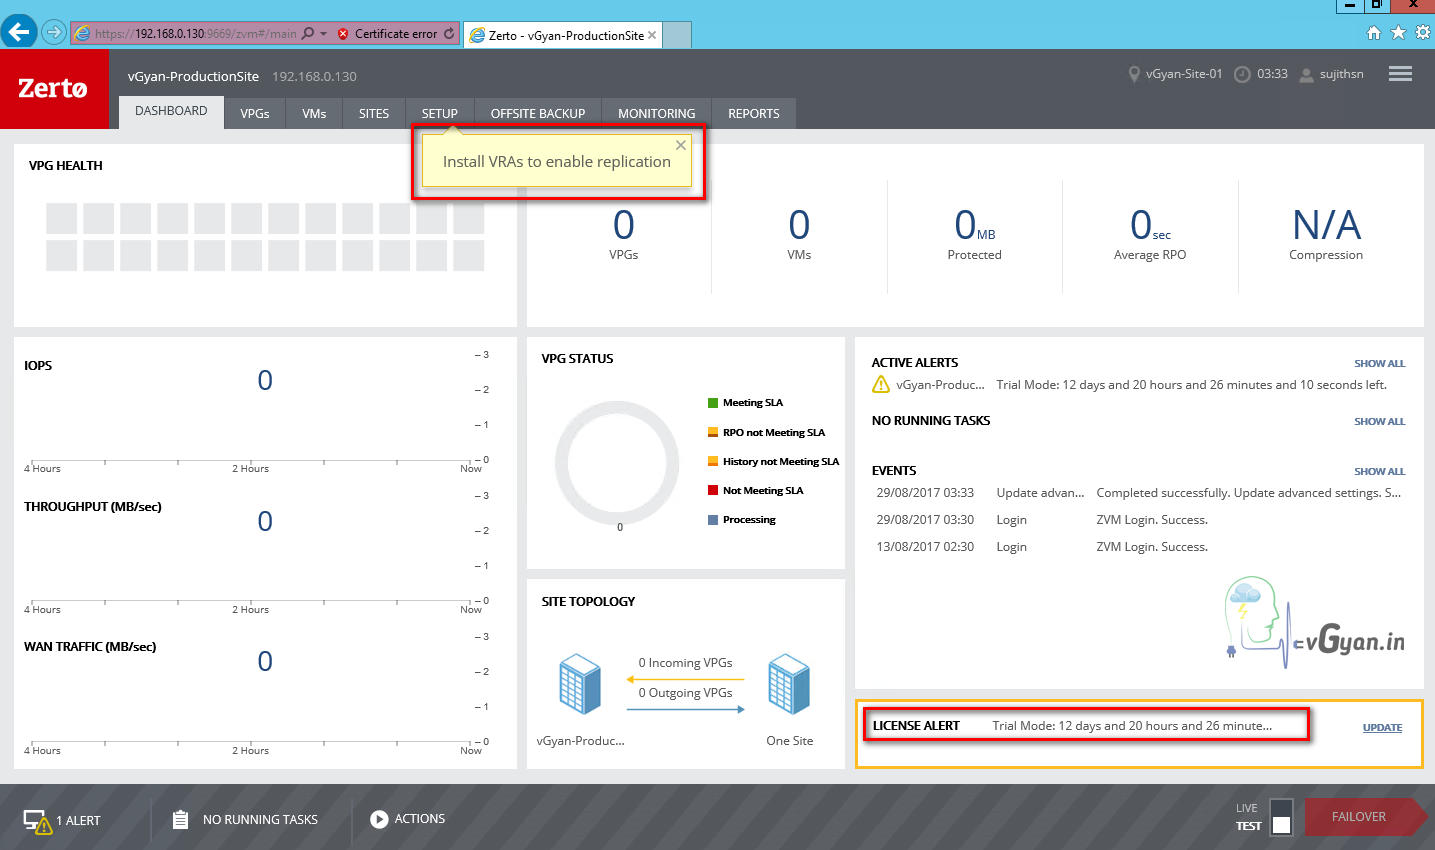
Now we are in newly installed Zerto Virtual Manager Web client. I will discuss about this user interface later.
So we completed protected site ZVM installation, next we will perform a Express Installation for recovery site.
I am in my second server for recovery site installation, ZVM installer already opened and performed few steps.
In the installation type I am selecting Express Installation. Click Next to continue:-

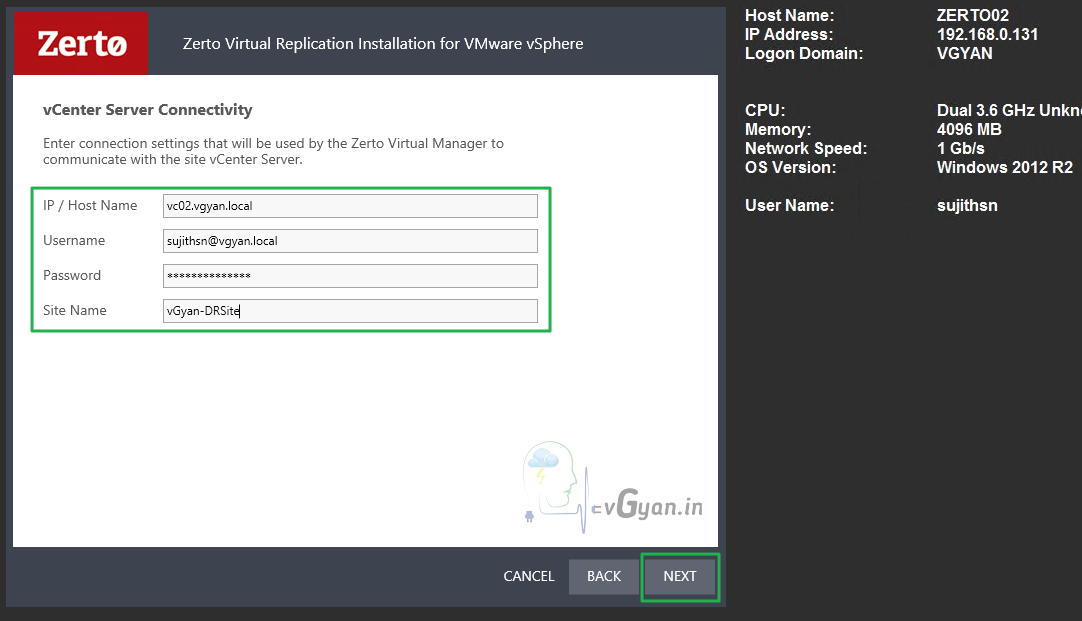
Provide vCenter server connectivity details,
IP/ Host Name: vc02.vgyan.local
Username: sujithsn@vgyan.local (administrator access)
Password: ******
Site Name: vGyan-DRSite
Click Next to continue:-
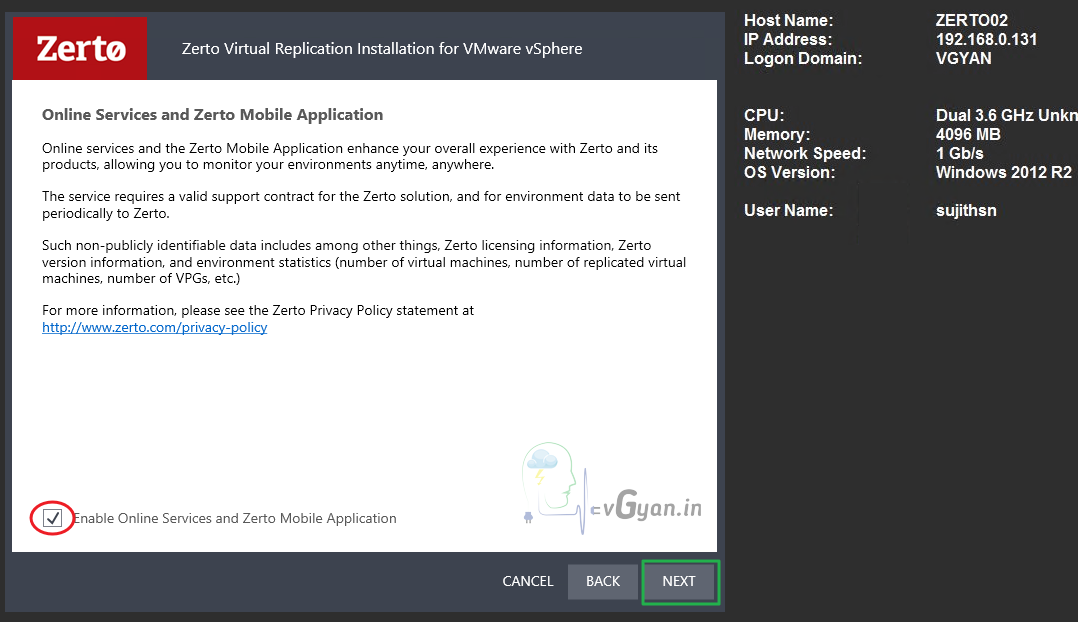
Same online services and Zerto mobile application, if you want to manage recovery site from mobile application, select Enable option and click Next to continue:-
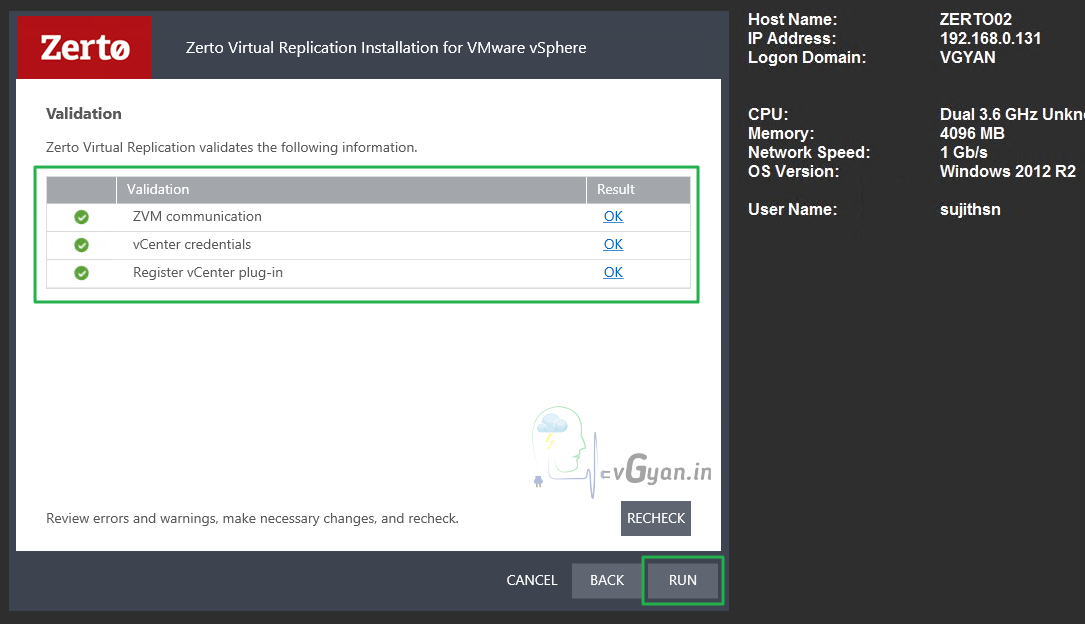
Installer will validate all the provided information.
- ZVM communication
- vCenter credentials
- Register vCenter plug-in
Once all the validation succeeded, click on RUN to start the installation.
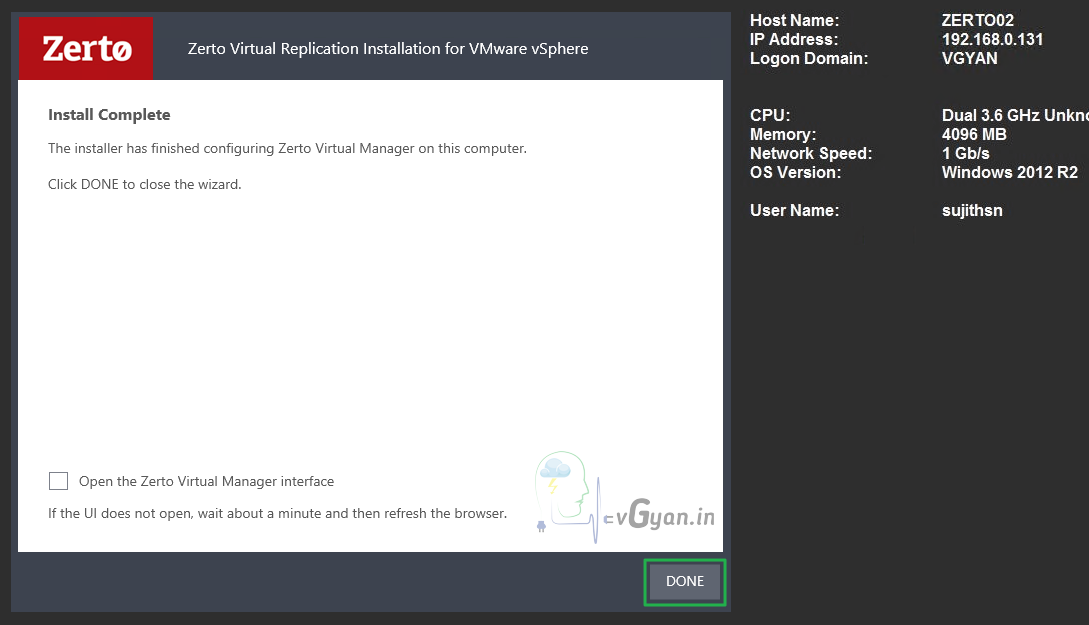
Recovery site ZVM installation completed, click DONE for closing the installer.
For accessing ZVM console, open any web browser go to https://FQDN or IP:9669
For me its https://zerto02.vgyan.local:9669
Once the Virtual Manager Web Client opens provide the vCenter credentials which we provided on the installation phase.
Click on LOGIN.
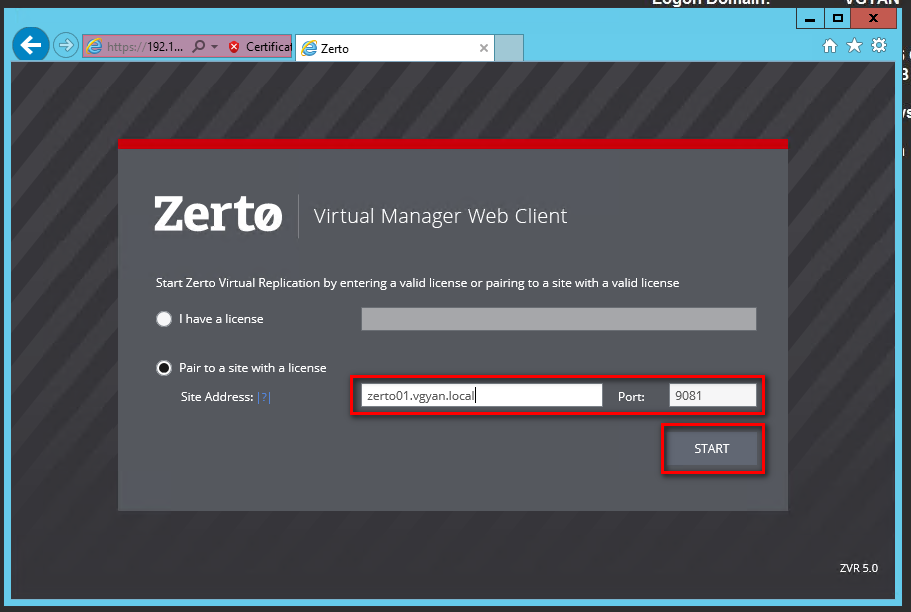
I am going to pair this recovery site with my protected site so the license will be applied here.
For pair to a site with a license, Site Address: zerto01.vgyan.local, port: 9081
Select START.
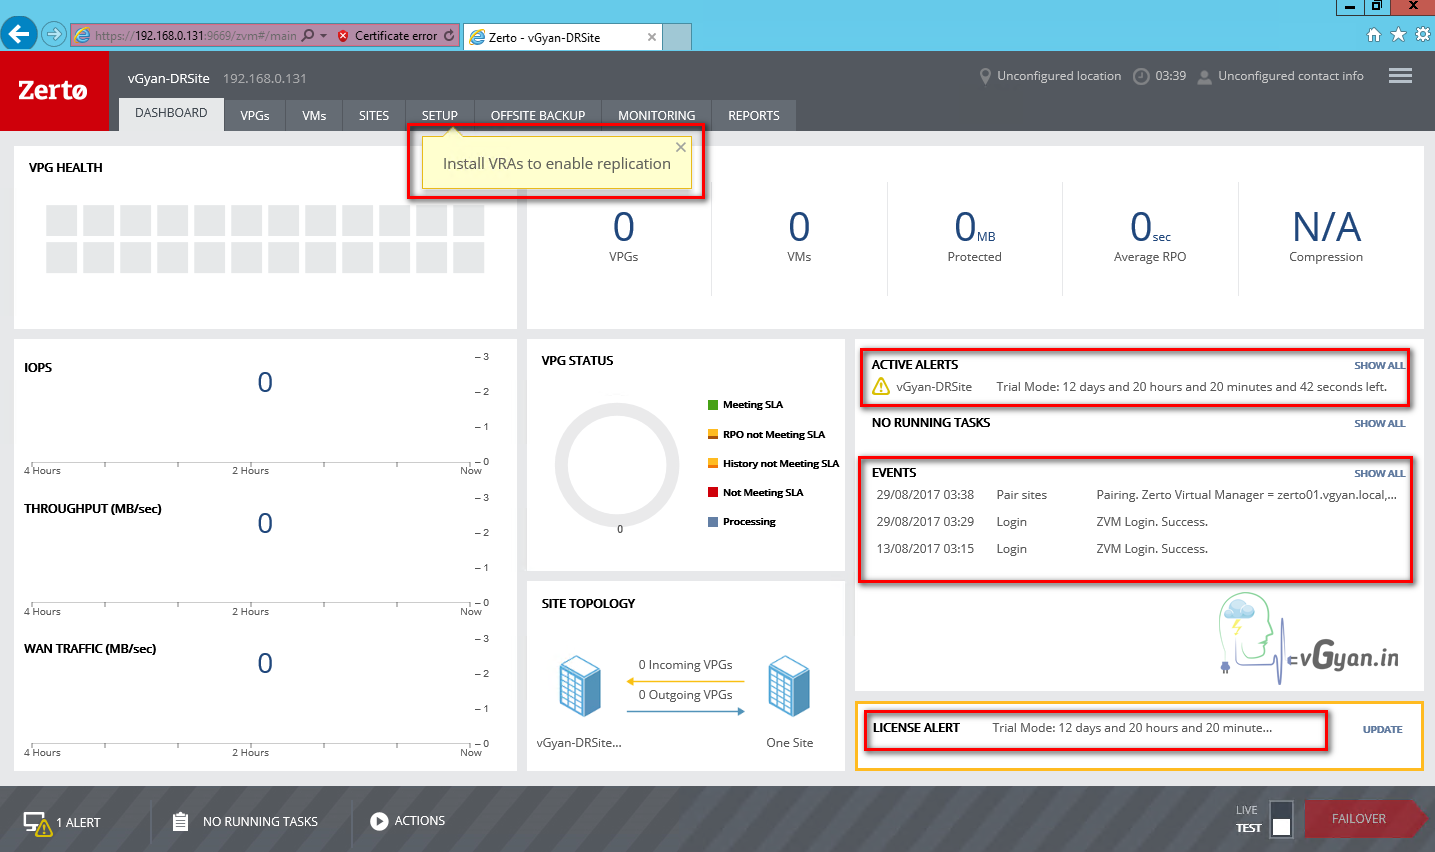
Now we are in recovery site ZVM web client.
We will discuss more on Zerto Virtual Replication on upcoming posts.
I hope you enjoyed reading this post. Feel free to share this to others if it is worth sharing!!!


